SU Podium Render, OOPR, Preview, and Edit
Before pressing the Render button or Render icon, you may want to check the Options menu, to see where the rendered image will be saved and to look at other settings.
By default, the rendered image will be saved to the same folder as your SketchUp model. However, this can be changed to a folder of your choice. Please read the (needs a link) Options section on how to Save your image.
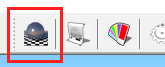
To start the rendering process, click on the Render icon from the Tool bar.
The rendering steps you should see from start to end are:
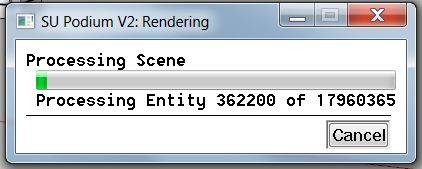
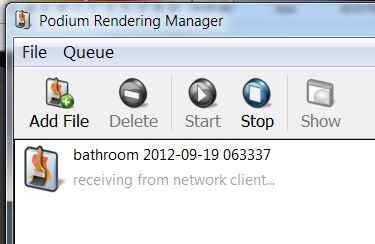
Processing Scene and OOPR open. Processing Scene progress bar displays the number of entities being processed. At this point OOPR is idle and has a message "receiving from network client....".
Processing Scene finishes and then UV mappings starts (UV mapping is usually very quick.)
OOPR starts Prerendering.
OOPR starts Raytracing when Prerendering is finished. At this point you can click on Preview to see the progress.
OOPR start Resampling (anti-aliasing) and finishes and the rendered image is saved.
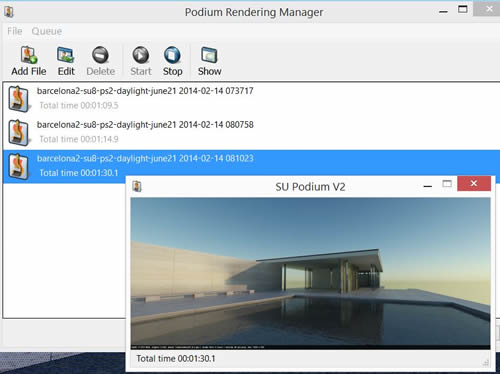
Once the rendering process is in the Raytracing stage, you can preview the rendering progress dynamically by picking the Preview menu in the Podium Render Manager UI (OOPR).
The preview image will be much smaller than the actual rendered image but it allows you to see dynamically the raytracing and anti-aliasing (smoothing) stages.
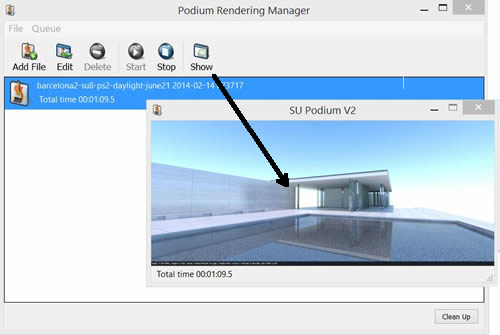
When the rendering is finished you will see a Total time message.
The image has been saved to the folder of your choice. At this point you can invoke Edit which will load up the Podium Image Editor with your image automatically in it. You can use Podium Image Editor to add some effects the your image. Please read about Podium Image Editor here.
Troubleshooting: If OOPR hangs up, produces a Runtime Error message or stops, please read this toubleshooting page.