- SUPlugins Home Page
- Help Video Tutorials
- V2 Plus: New, free
- Operating SU Podium V2
- 1. Install
- 2. Activate License
- 3. Render process and getting started
- 4. Download and samples to test
- 5. Where to get Support
- 6. What version do I have?
- 7. Check List to help Support.
- Options Menu
- Apply Material Properties
- Lights
- Render, OOPR, Preview
- Other items in the pull down menu
- Other Features
- 1. Podium Browser: Light Fixtures, Plants, etc.
- 2. Omni Grid V2
- 3. Podium::Render script
- 4. Podium Styles
- A summary of Tutorials
- FAQ and trouble shooting
- Migrating from Version 1.7.3
- SU Podium V2 Books
- Software End User License Agreement
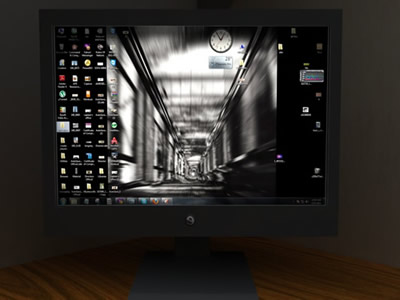
Tips pageHidden LEM Tip - Render a computer monitor or TV How to get rid of blotches Interior lighting walkthrough Getting ready to print Podium materials - Why diffuse, transparency, and reflection? Preparing for exterior rendering Using PP to finalise your rendering How can you create the effect of a computer monitor or TV screen illuminating an interior space. You can create this effect with the new hidden LEM.
This image was produced by Steven313 (Forum alias). Read about his discussion on how to do this on this thread - Hidden LEM tip
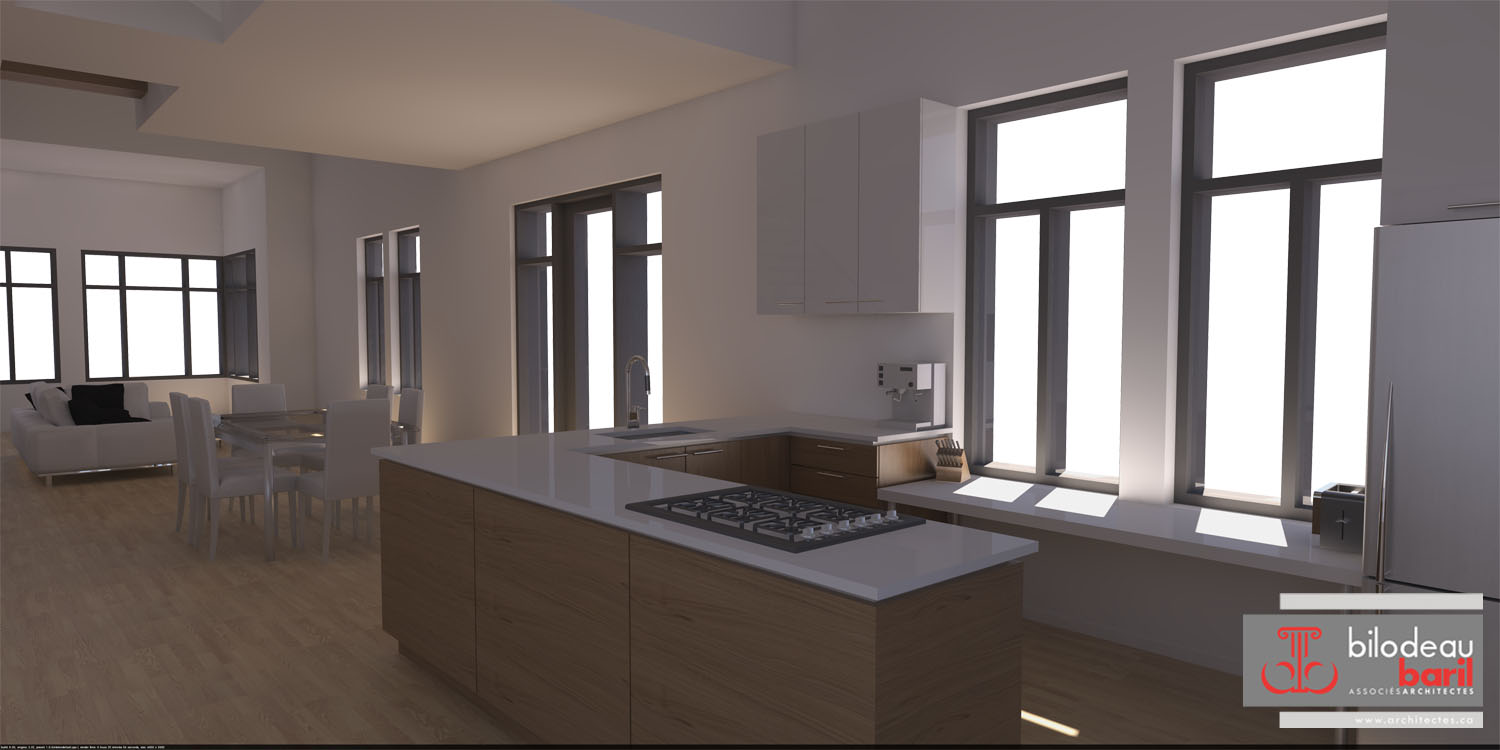
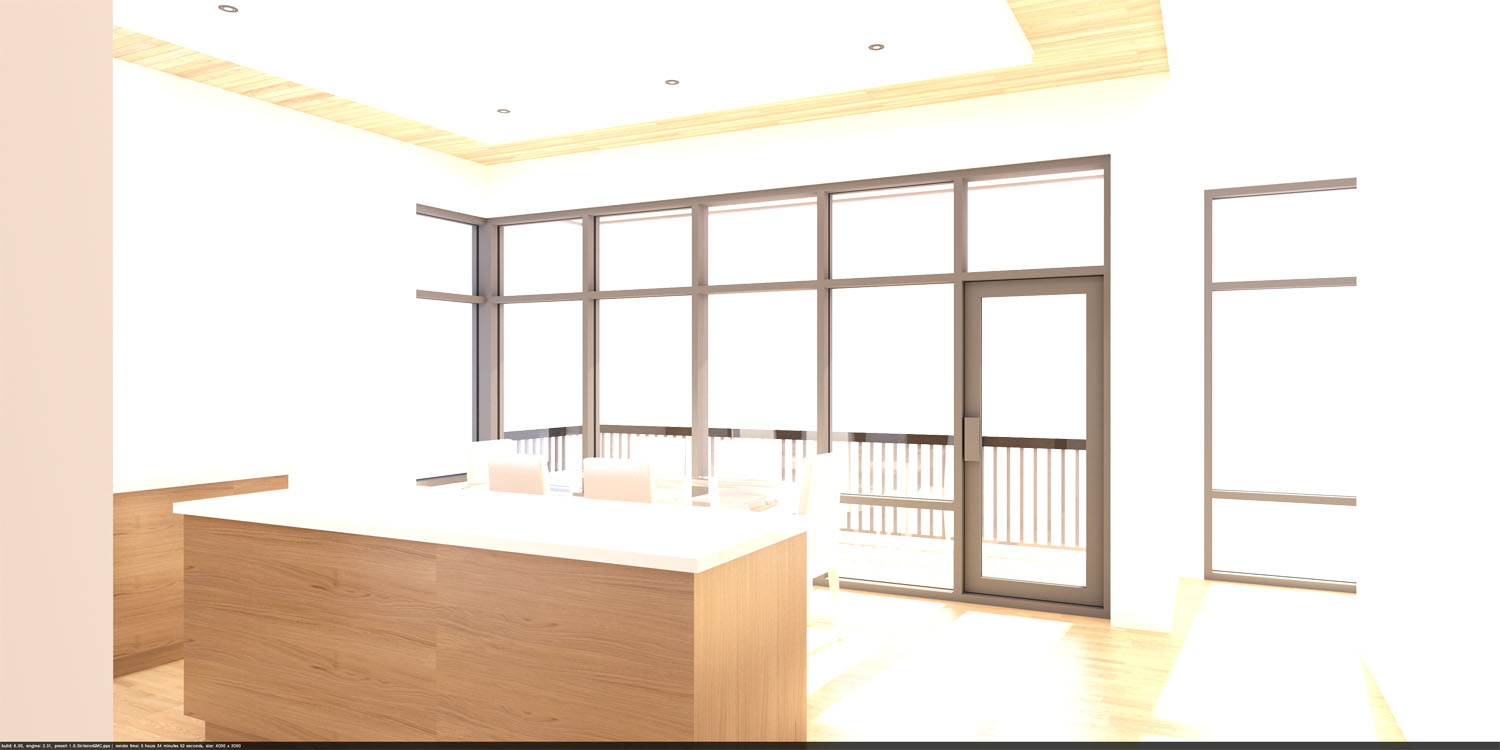
SU Podium V2 presets are calibrated to be as fast as possible. Unfortunately, some imperfections such as blotches or unexpected corner shadowing will sometimes appear in the rendered image. These anomalies can appear quite randomly especially on non-texture pale surface, corners and low polygon geometry scenes. Those imperfections are caused by the lower quality and precision of the Podium V2 preset. QMC presets are made especially to overcome this issue. But the cost is a substantially slower rendering time. QMC presets can also produce a more grainy image. To overcome the graininess of QMC presets, it is recommended that you render at a higher pixel resolution than you need and re size the image after it is completed. This will solve most of the current blotches and artifices. If they are still appearing with the QMC presets, please contact us. |
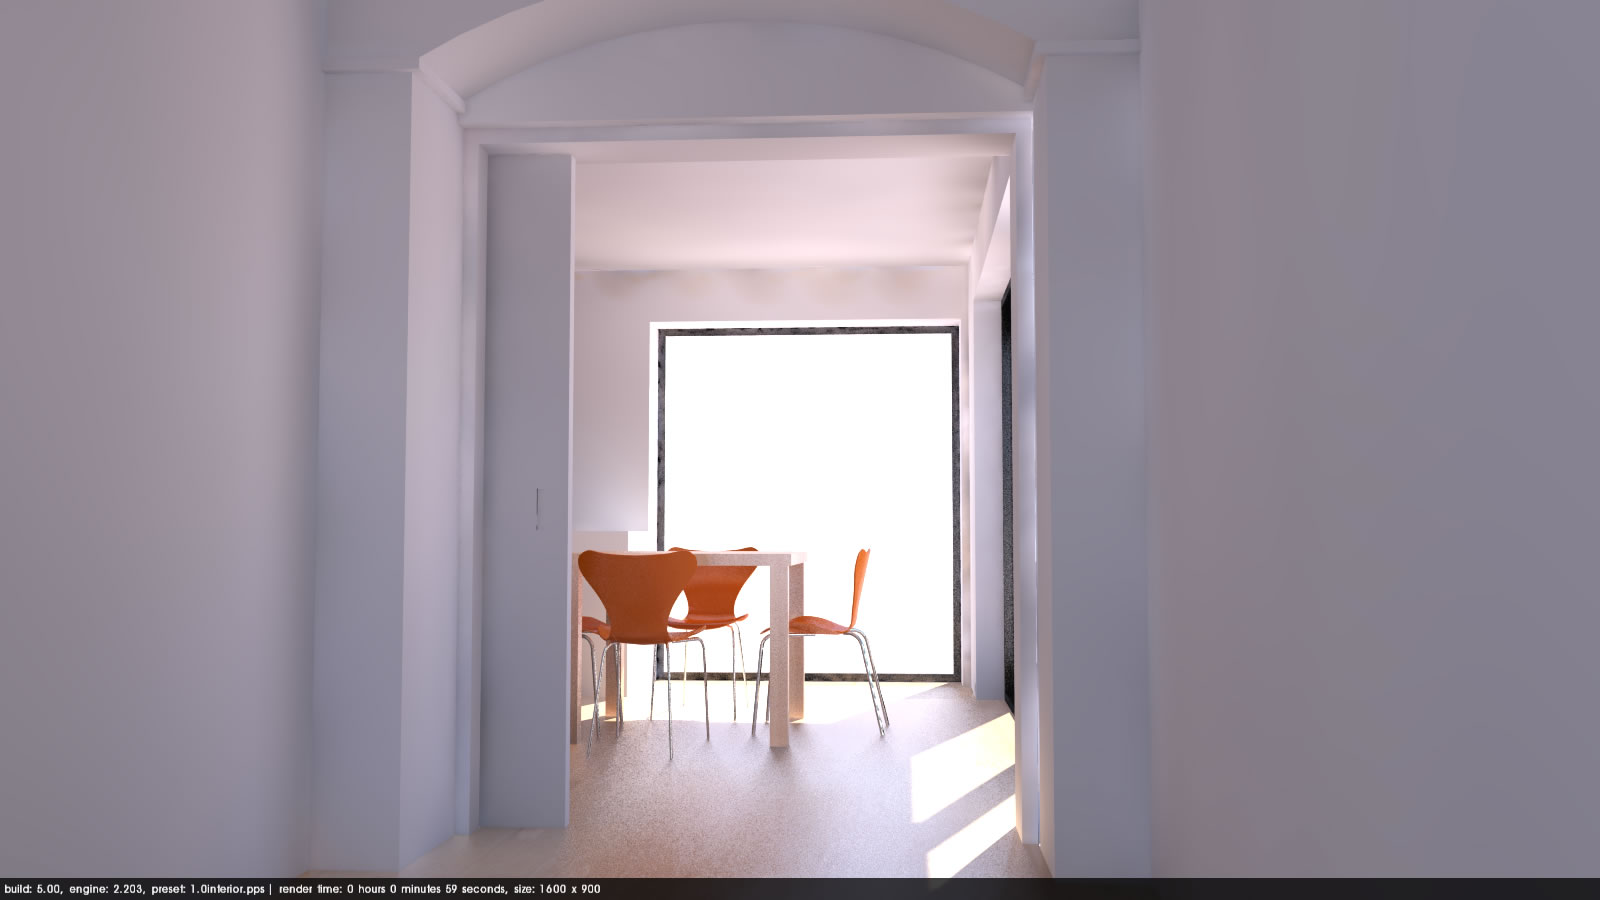 Before with interior preset |
 After with QMC-interior preset |
| Back to the Top |
Nicolas Harvey discusses tips on using Sunlight, LEMs and light fixtures for interior lighting.
Read about interior lighting tips here.
| Back to the Top |
SU Podium's image "resolution" settings are based on pixel dimensions such as 800 X 600 or 1920 X 1080. Podium allows for pixel dimensions that are greater than most video monitor sizes such as 4,076 X 3,304 pixels. You can even enter a custom size such as 8,000 X 6,000. Why do we offer higher pixel dimensions than what most monitors provide? Primarily for printing. The higher the pixel size image you have, the greater the paper size and document resolution you can print to. When it comes time to print your image, there are some calculations to be made.
For example, if you want to print a rendered image of the size of 36" by 24" at 200 DPI (Inkjet), the pixel resolution in Podium should be around 7200 X 4800.
SU Podium does NOT have any print capabilities. The JPG or PNG file generated by Podium will need to be printed from an image editing program such as Photoshop, Fireworks, Paint Shop Pro, etc. The one feature you will need from your image editor is the ability to change the print size dimensions and the Dots per Inch.
There are two terms often used in printing and that is PPI and DPI. They are often used interchangeably although technically they have different meanings. The default resolution in Pixels Per Inch (PPI) for JPG/ PNG generated for a computer screen is 72. Images on a monitor will look good at 72 PPI but if you print on most paper sizes at 72 PPI, the print will not look good.
Open a Podium generated PNG in Photoshop or Fireworks and look at the image size. If you opened a 1200 X 700 image in Photoshop, you would see the document resolution is 72 Pixels/Inch and the default print size is 16.667 X 9.694 inches. If you were to print at these dimensions, the resolution of the document would be poor. To get better print results, you need to increase the document resolution by increasing the PPI or DPI.
Turn Resample Image option off and increasing the PPI to 360. Now the document size is approximately 4 X 2 inches. That means if you want to print an image that has a pixel size of 1200 X 700 on paper, the paper size would have to be about 4 X 2 inches if you print at 360 PPI.
Open an image in Photoshop (or your favorite image editor) that is 3076 X 2304 pixels. Turn Resample Image option off and increase the Pixels/ Inch to 300. You can print this at 10.253 X 7.68 inches and at 300 PPI. As you can see, the higher the pixel size of the Podium image, the more document size and print resolution options you have.
Printers use DPI measurements such as 300 DPI of Laser Jets or 200 DPI for Ink Jets. Although we often equate PPI to DPI, DPI is a print term and is the number of dots of ink a printer can place per inch. Most often the printer's DPI is set to some number like 200 or 300. The main thing to consider is the higher the document resolution measured in Pixels/Inch, the better your print will look.
There is a related article here - http://photo.net/learn/resize/. Also, if you are confused about inch sizes and want to translate to MM take a look at this paper size calculator web page - http://www.dpandi.com/paper/index.html. Another useful image size/ paper size calculator web page is here - http://auctionrepair.com/pixels.html.
| Back to the Top |
When you start to set up your own materials, you will start in SketchUp by applying texture, color and transparency. SketchUp allows you to configure and display these basic material properties.
Podium supports some more complex and subtle properties like reflection, refraction, bumpiness and light emission. These are very straightforward to set up. But there are some things that it are helpful to understand first of all.
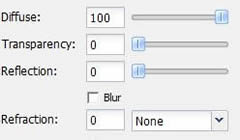
There are three main sliders in the dialog labelled - Diffuse, Transparency and Reflection. These configure the basic surface properties, and this article explains them in a little more detail.
In reality, the way you perceive a material is based on the way rays of light (the technical term is ‘photons’) hit the surface, reflect off it and travel to your eye. Light is actually invisible until it intersects and reflects from an object. If you shine a flash light in a cave, the only light you will see is reflected off surfaces. You will see a patch of light where the it hits a surface, but if there is no dust or water vapor, you will not see a beam of light like a laser. Where you can see a distinct ‘beam’ of light, this is caused by light reflecting off particles in the air. This illustrates the basic principle that our ability to see objects is entirely based on the principle of reflected light.
When light hits a surface, some of the energy is absorbed, and some reflected. Diffuse reflection is what enables us to perceive color and texture, and describes the way that when light hits an object, it penetrates just below the surface of a material and is reflected, but the light is ‘diffused’ or scattered in different directions. Even highly polished surfaces have diffuse reflection. For example, a polished white marble surface is still identifiably white. When light hits a surface, the color the surface appears depends on the wavelengths of light absorbed and reflected by the surface. For example if a surface absorbs more light in the red spectrum, then that surface will not exhibit much red in the color If the surface reflects more light in the red wavelength, its color will appear to be reddish. This is a complex topic in its own right (more info here) but it demonstrates that you almost always need some diffuse reflection for any surface. Even for colored glass, if you want to see the color, you need an element of diffuse reflection.
What people usually understand by the term ‘reflection’ is technically ‘specular reflection’ and it occurs when light bounces off flat surfaces and is reflected in a uniform direction. This is easy to understand, and as you increase the value of this slider, the more your material will reflect the environment.
The third component is transparency, which is when light passes through a surface.
A material’s appearance is based on the way light interacts with the surface. Some of the light is absorbed some passes through it, some is reflected back and diffused, and some is reflected back in a uniform direction.
Podium’s way of rendering materials is based on these physical properties. So if you want to get the most realistic materials, you need to be aware of the need for the diffuse component, and balance this against reflectivity and transparency.
In Podium, because almost all materials absorb some of the light that hits them, materials are configured so that if the sum of the diffuse, transparency and reflectivity sliders adds up to 100% in the dialog, the actual total used by the render engine is around 95%. It is also impossible to configure the sliders so they add up to more than 100% which would be unrealistic because it would mean that materials reflect more light than they receive!
For most materials, the most realistic appearance is obtained when the sum of the values in all three sliders adds up to around 100%. It does not’t matter if it’s 97% or 98%, and some solid, non-reflective surfaces (like wood for example) may absorb more than 5% of the light energy that hits them, so configuring them by setting the diffuse slider to 80% should’t be a problem.
In summary, when configuring materials, understand the diffuse component, and set some value for it for virtually all surfaces.
| Back to the Top |
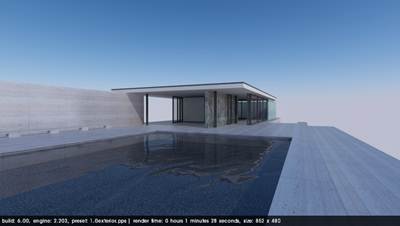
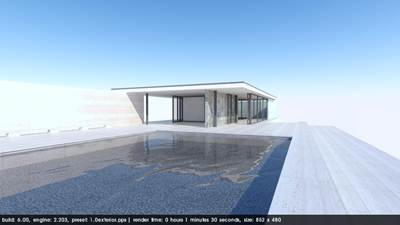
The first step to setup any Podium rendering is to choose which preset to use. There are three categories of presets; default, exterior and interior. Default is a general purpose preset not calibrated for anything specific. On the other hand the two others presets are especially made to give the best results for their specific environment. In addition, these two presets have several variation to give different quality and speed results which are preview (lowest quality but fastest), QMC (highest quality) and the standard.
Although, it is recommended to use the QMC preset, when you notice imperfections, blotches or blemishes, 1.x_exterior_default.pps is often sufficient. Default.pps preset is not adequately calibrated for exteriors scenes and results in unbalanced rendering such as too bright or too dark. 1.x_exterior_default.pps is generally the best choice for your exterior scenes. (Exterior scene would be defined as a environment that uses either sun light or sky light or both as predominant light source.) 1.x_exterior_high.pps does not have higher quality but provides much more anti-aliasing and smoothing to edges.
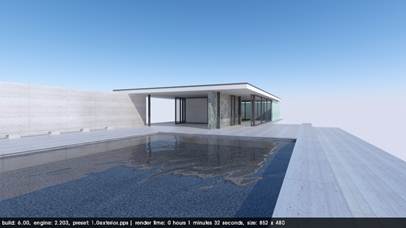
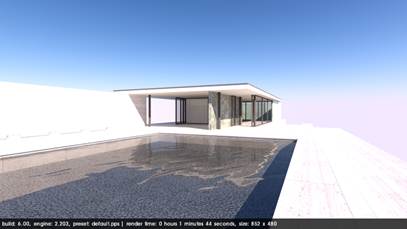
After you have selected your preset, you can adjust sky and sun light. Do not forget to activate shadows in SketchUp for Podium to use Physical Sky and use its own sun orientation. Podium physical sky is the key for realistic renders. This will give a greater color depth than the SketchUp sky. Make sure it is activated in the “Environment” tab of the Podium Option window. It is also in this window that you will able to adjust the Sun strength. You can modify brightness with the intensity and exposure sliders.
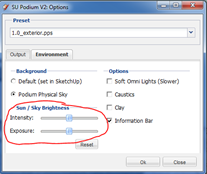
Intensity controls the brightness of areas that are exposed to sunlight. Exposure will control brightness of shaded areas. If you want to simply adjust the sun’s strength, move the two sliders equally. Be generous because less than 25% changes will not have an effect.
Sun Intensity/Exposure at 0%
Sun Intensity/Exposure at 100%
You are now ready to do some test renderings, add advanced material properties and some detailing to get the best rendered image.
| Back to the Top |
If you did not already know, the acronym “PP” which is vastly used in the rendering world refers to Post Processing. It is a “second touch” to your images produced by the renderer. Many programs will help you do this. The most popular, Photoshop, will be used in this article, but many other lower cost or free image editor exist. Some examples would be Paint Shop Pro, Fireworks, Gimp and even Adobe Elements.
The goal of PP, is to fine tune your images; tweaking it to your liking, with speed and a lot of control. Using PP is a lot faster then re-rendering in Podium each time you need a tweak and therefore is very productive. Many PP features are not offered in Podium simply because they are readily available in PP programs. Post processing programs are especially good at tweaking colors, brightness, contrast, etc. so lets leave these features to them. In addition, all photography and rendering professionals uses PP. Post processing is often a necessary part of your work flow as you can not expect even the most advanced photo-realistic rendering program to output perfect images every-time.
Good lightning is crucial for a high quality image and can be tricky to achieve directly in Podium. That’s where PP comes to help. There's no need to fine tune your lightning in Podium/ SketchUp. One achievable goal is to get all the correct light sources to provide an acceptable level of brightness in Podium. Then, adjust the lighting to your taste in PP. For example, a dark rendering is easy to brighten-up whereas an image that is too bright will often be beyond repair. So it is better to aim for less brightness in Podium to be tweaked in PP, where you have instant response and lots of control.
In Post Processing programs, the brightness feature generally will not give you good results as it will whiten or darken the entire image. What we want to do instead is to brighten the white areas, almost as if the Podium lightning was stronger. That’s where the “Levels” tool in Photoshop ( CRTL+L) is very helpful. Move the right slider to the left to brighten your image, but do not overdo it, so as not to lose information. Moving the left slider a bit to the right will also add some depth.
When the graphic shows low values on the sides, the sliders can generally be moved towards the middle without losing too much information. This is often when they need to be moved.

Below - Before: Raw Podium render - almost too dark to be usable.
Below - After Post-Processing: Levels adjusted to brighten up. Color balance to match the out-door photo and photo integration.

Below - Example of an over-lit rendering that cannot be saved
Many other modifications can be made, to make your renderings look better, such as; color balance (reducing the blue tint) saturation, depth of field, god rays etc. All of these, and many more have extensive tutorials on the Internet.
You many wonder why SU Walk, includes a brightness slider and Podium does not. The reason, beside all the others mentioned above, is pretty simple. Walk is a real-time application used for video animations. When you change the value, you see the result immediately. That would not be the case for Podium. It would cost a lot of develop time to have PP features in Podium that are readily available in lots of image editing software.
PP techniques will save you a lot of time and help make your renderings look great with some practice. Head over to the Podium forum to get insight from us and other members on how to make your rendered images look better or show the rest of us your skills and techniques.
Happy rendering!
