Visualizing a bathroom with SketchUp, Podium Browser, and ProWalker GPU / SU Podium
Reference and goal
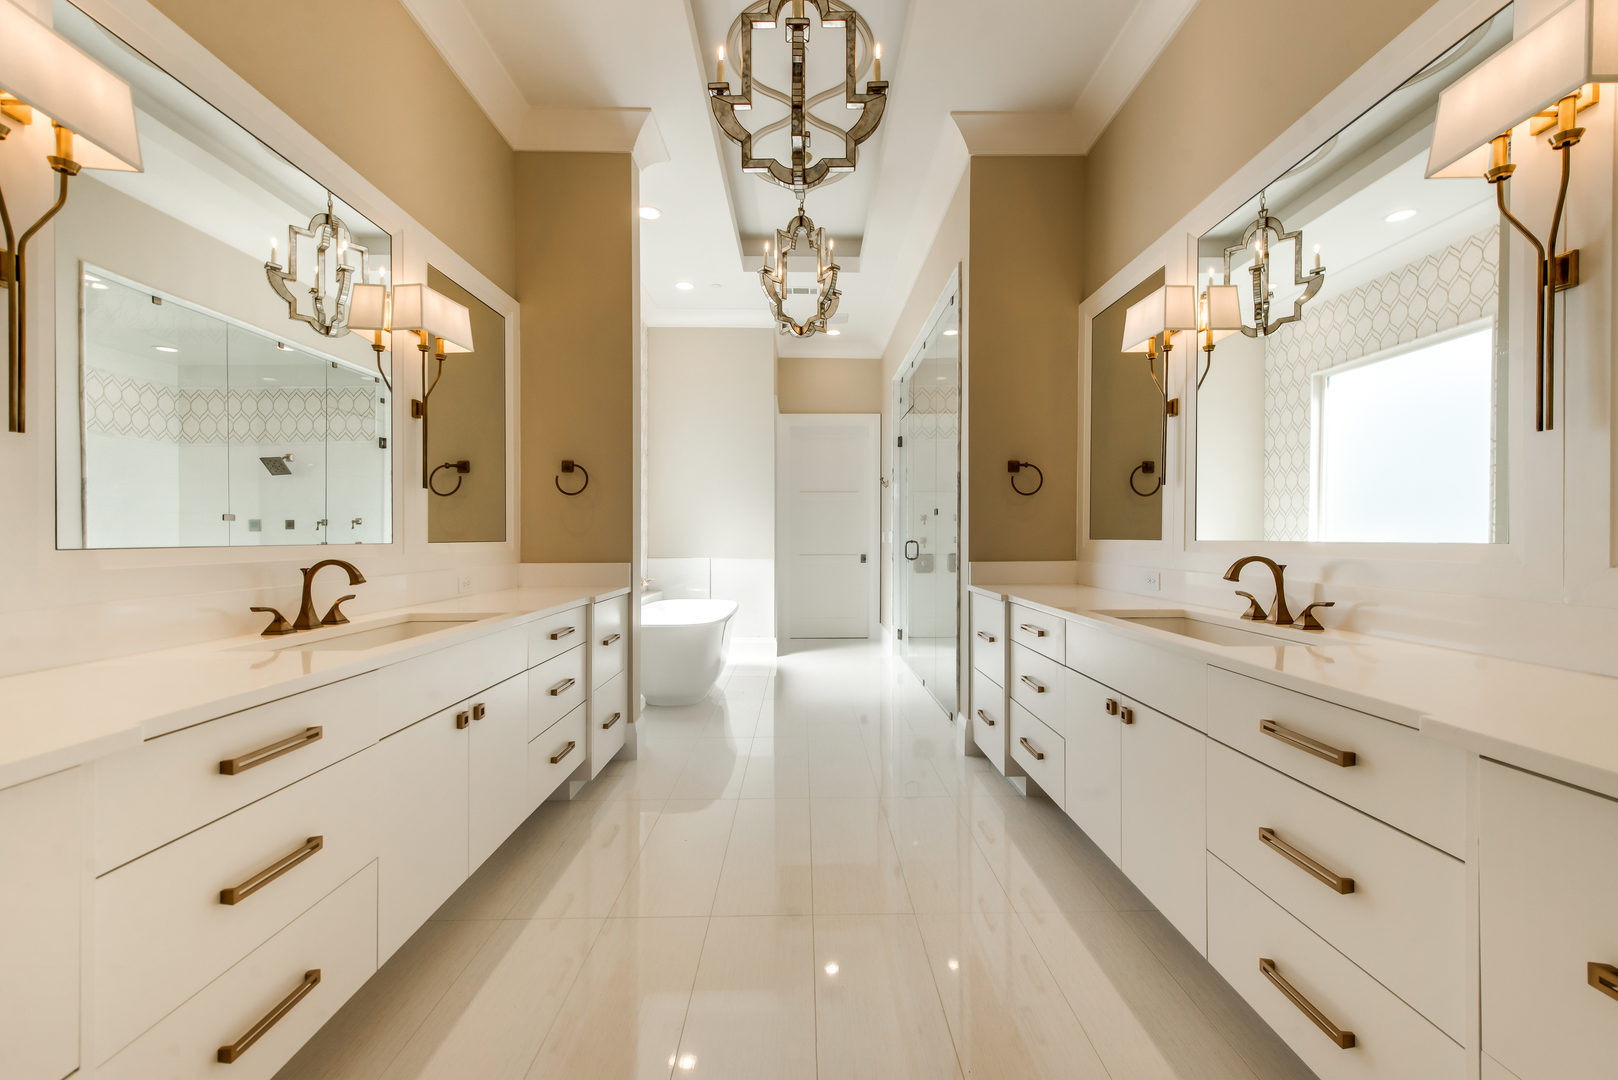
Reference photograph by Atwood Home Designs
The goal of this project was to recreate the reference image seen to the right, demontrate how to use the Metrie crown molding/baseboard/casing profiles from Podium Browser, and then create a realistic render with either ProWalker GPU or SU Podium V2.6.
The recommended way to follow along is to download the starter model below, and then watch the roughly ~1.5 hour video tutorial embedded in the next section.
SU Podium can also be used for rendering if you can't or don't use ProWalker GPU.
Process breakdown and tutorial video
This tutorial video walks through the creation of a bathroom scene using SketchUp, Podium Browser, and ProWalker GPU.
The first half of the video talks about best practices when modeling an interior scene in SketchUp with the intention to render the model — topics include how to construct a scene to avoid render artifacts, how to use the follow me tool with Podium Browser's finishing profiles, and how to improve realism with Fredo Roundcorner. The second half of the video explains how to add materials, light sources, and render the model with ProWalker GPU.
Timestamps: Use the following links to jump to a specific topic
Interior modeling best practices, Podium Browser components, materials, and light sources
YouTube livestream replay - Modeling process in real-time:
Much of the modeling for this project was completed during the course of a two-part livestream demonstration on YouTube. The condensed 1.5 hour breakdown at the top of this section is more concise and informative, however if you want to see any of the modeling process in real-time, the two livestreams are linked below. Be aware that these are relatively unfocused and frequently go off-topic to answer questions from the audience.
Part 1
Part 2
Podium Browser components used in this scene
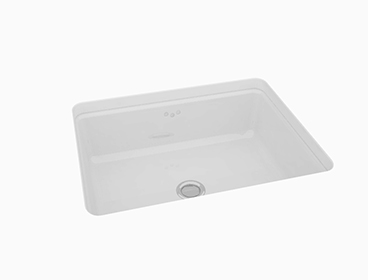
Kohler Kathryn 2330
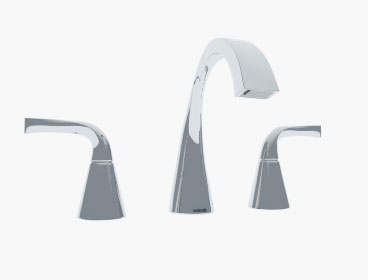
Oxby Spot Resist (changed material)
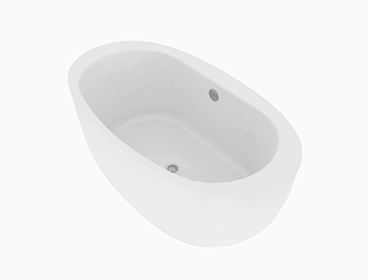
Kohler Sunstruck 6368
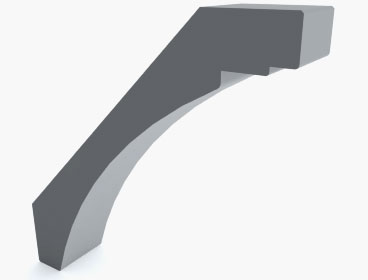
Metrie Very Square Crown - 6.25"
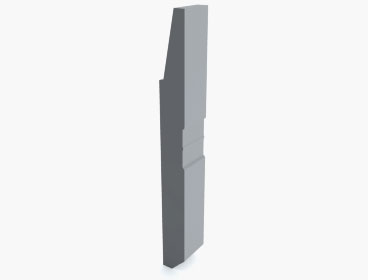
Metrie Very Square Casing - 4.5" - Used to frame mirrors
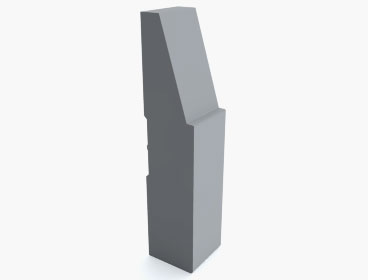
Metrie Very Square Baseboard - 7.25"
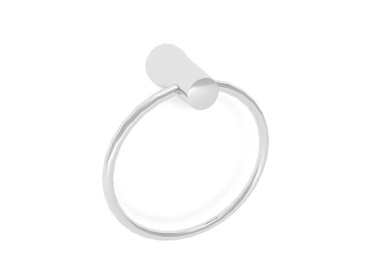
Kohler Toobi towel ring (changed material)
Blanking plate
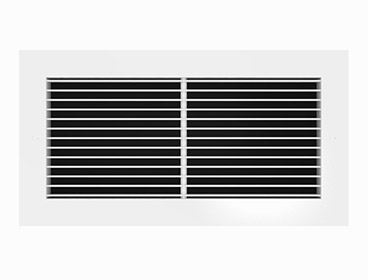
Vent 03
US power socket
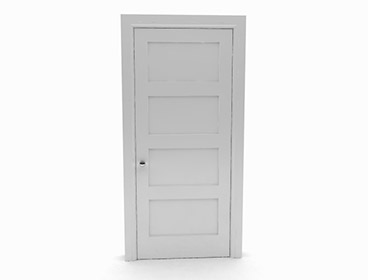
Door 15
Materials and their settings - from Podium Browser unless noted
The majority of the materials in the scene are from Podium Brower, with one or two exceptions. All the major surfaces in the model are documented below:
Florida Tile - Gallant Carrara 18x18
Diffuse - 87 Reflection - 13 Transparency - 0 Bump depth - 0 Used on floor
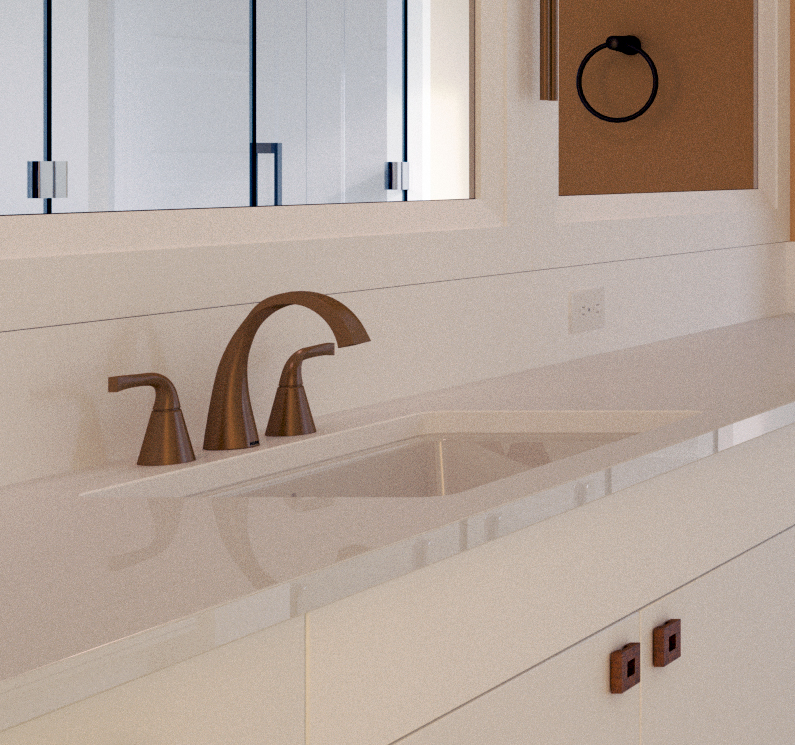
Materials that were already applied to Podium Browser components are not pictured above, but some of them are covered in the tutorial video. A few of these include the white acrylic material applied to the bath and splash guard (94% diffuse, 6% reflection), the vanity countertop (85% diffuse, 15% reflection), and various light emitting materials (explained in the next section).
Background HDRI settings and artificial lighting
The main source of light in the scene is the window above the bathtub. ProWalker GPU gives us two options for natural lighting — a physical sky simulation that uses SketchUp's date/time system to determine the angle and intensity of the sunlight/shadows in your image. The other option is to use image-based lighting driven by an HDR background image.
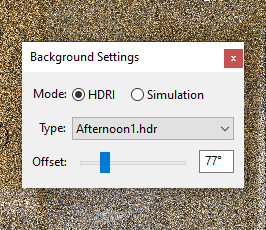
For this image I used the "Afternoon 01" background setting, with the offset set to 77 degrees. ProWalker GPU provides five HDR background options, but additional backgrounds can be downloaded and installed from the ProWalker website, or from third party sources like HDRI haven.
The offset slider controls the rotation of the background, and determines the angle and distribution of light and shadow in the render. Our chosen offset of 77 degrees places the sun to the left and slightly behind the window, causing most of the sunlight to fall on the shower and bath alcove.
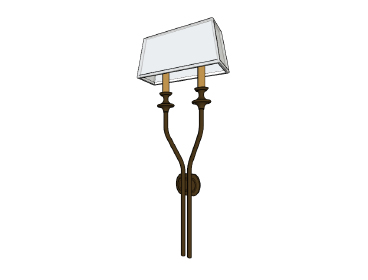
The reference has several artificial light sources — for the suspended chandeliers and recessed lights, I used components from Podium Browser. The wall mounted light fixture over the vanities was modeled by eye from the reference (included in starter model download). I deleted the omni lights from each of the two Podium Browser fixtures, and used light emitting materials instead.
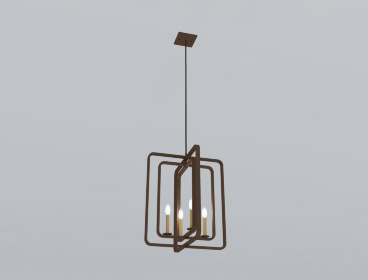
Hinkley Quentin 4814KZ
LEM Power - 7
Reggiani Mood Fixed Trim Round
LEM Power - 7
Modeled from reference
LEM Power - 12
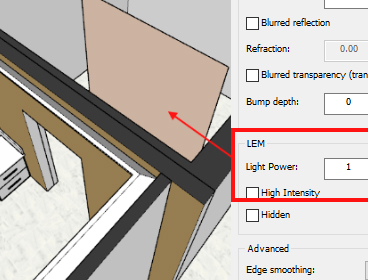
Behind camera LEM
LEM Power - 1
A large light emitting material panel was placed in the room behind the camera to cast additional light into the scene — the main purpose was to hit the vanities with a small amount of reddish/pinkish light. I wanted the effect to be very subtle, and kept the LEM Power as low as possible.
ProWalker GPU does not have a "soft omni" option — Unlike SU Podium, ProWalker GPU does not have a soft omni option, so there isn't a way to soften the shadows cast by omni lights. Because there are no "hard shadows" in the reference image, I decided to delete the omni lights from the chosen light fixtures, and replace them with Light emitting materials. This is depicted in the video at 00:53:40.
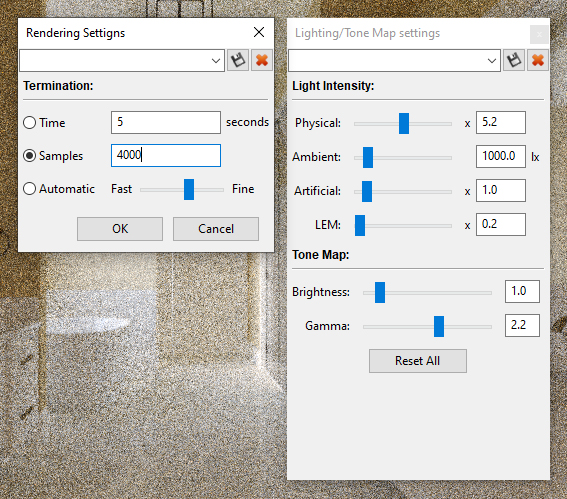
Lighting / Tone-map and Termination Criteria
Lighting and tonemapping settings are explained in detail in the tutorial video at 1:21:58.
LEM Brightness — One difficulty when using ProWalker GPU is that light emitting materials are quite overpowered in ProWalker versus a comparable LEM in SU Podium. In other words, if you have a light emitting material with a light power of 7, that LEM will be significantly brighter in ProWalker than it is in SU Podium.
The solution for this is to use the global LEM slider, and drop the value far below the default value. Setting the LEM slider to ~0.1/0.2 tends to work well for LEM materials with a light power between 1-10. For this image, I set the LEM slider to 0.2.
Physical slider - The physical slider controls the brightness of "natural" light sources in ProWalker — this includes the physical sun/sky simulation, or the HDRI background image, depending which option is selected. I wanted the window to be the primary source of light in my render, so I moved the Physical slider to 5.2 to substantially increase the amount of light being cast into the room by the HDRI background.
Termination criteria
It's hard to make a broad suggestion with regard to termination criteria (samples), because every model is different, every user has different hardware and different tolerance levels for noise in an image.
Interior renders with artificial light typically require a lot of samples when using PR mode — for this type of image, more than one-thousand samples are usually needed both with and without the denoiser turned on. I personally don't mind a little bit of noise in a render, and prefer subtle noise over the "softness", or loss of clarity that the denoiser can introduce.
For my render I turned the denoiser off, set the termination criteria to 4000 samples, and let the render run overnight. In the close-up crop pictured right, it's clear there is still some noise in the image, however I do not think it detracts from the render. When zoomed further out, the noise is less noticeable, and I find the subtle texture appealing.
Exporting a still image from ProWalker
Don't forget that the image seen in the ProWalker viewport is simply a preview render. After you have chosen your background, configured your lighting, and determined your termination criteria, you must use the "capture an image" button to render and export a still image. This is covered at 1:28:32 in the tutorial video, or simply watch the short timelapse below:
Thanks for reading!
We hope this breakdown was helpful to you and provides some insight about how to model and render a bathroom using SketchUp and ProWalker GPU If you have any questions please let us know — and if you follow along and create something awesome we'd love to see it in the gallery forum!
If you haven't tried ProWalker GPU and want to give it a go, download the 30 day free trial at the link: