- SUPlugins Home Page
- Help Video Tutorial
- Forums
- FAQ and trouble shooting
- Operating SU Podium
- 1. Intro and Download
- 2. Install, Troubleshoot, Uninstall
- 3. Activate License
- 4. Render process and getting started
- 5. Download and samples to test
- 6. Where to get Support
- 7. What version do I have?
- 8. Check List to help Support.
- Options Menu
- Apply Material Properties
- Lights
- Render, OOPR, Preview
- Other items in the pull down menu
- Other Features and plugins
- 1. Podium Browser
- 2. Preset Editor
- 3. Omni Grid V2
- 4. Podium::Render script
- 5. RenderAll scenes
- 6. Podium Styles
- 7. Section_Tool
- 8. EditInPlace
- 9. PanoramaVR
- A summary of Tutorials
- SU Podium Books
- Software End User License Agreement
Podium Image Editor
Table of Contents
- What is PIE
- Apply and Cancel
- Launching PIE
- Where are the features?
- Histogram
- Light Level tool
- Color Button
- Brightness and Contrast
- Blur and Sharpen
- Vignetting
- Hue and Saturation
- Overlay
- Defringe
- .HDR files in PIE (read-only)
- Load Background Options
- History
- Crop Image
- Preset Filters
- Depth of Field
- Lower Slider
- Apply and Save
- Panorama
- Panorama Convert (Pano to Cubic)
Podium Image EditorPIE was created so that Podium users apply quick post processing or image editing to Podium rendered images without ever leaving SketchUp. Post processing means making changes to the bitmap image created by Podium. For example, editing the light levels, brightness, cropping the image, adding a background to alpha transparent image, adding an overlay and blending are post processing or image editing features. To do any post processing, previously, you needed a good image editor like Photoshop. PIE makes it easy to do much of the post processing inside SketchUp and in fact from the Podium Rendering Manager or OOPR.
Apply and CancelPodium Image Editor (PIE) does not have an Undo button to Undo features and filters that you may have invoked. The Cancel button will cancel any operations that you have selected and invoked. Apply button will Apply the edits you have invoked and can not be Undone. However, as long as you save the image using a different file name, you will not accidentally, alter the original rendering image permanently. Launching PIE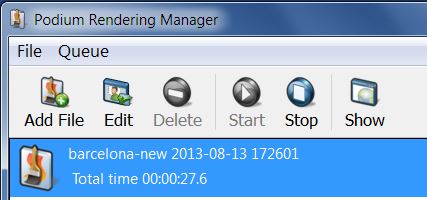
You can launch PIE from the Podium Render Manager or OOPR after you have rendered an image. Highlight the rendered image name from OOPR and click on Edit. You can also launch PIE from the SU Podium V2 Plus Tools menu. This is an independent way of starting up PIE. Once PIE is opened, use the Open file menu to load up an image you want to edit.
Where the features are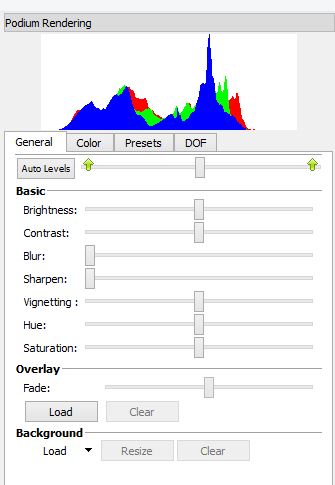
The right column displays the main editing features. You can resize this column's width. Histogram
Light LevelsThe Auto Level button will attempt to even out the darkest areas and lightest areas with the mid-tones. You can use Auto Level as a start point to adjust the lighting in the rendered image. Use the light level sliders to adjust the lighting manually. The light Levels slider can be used to correct dark areas, mid-tones, or excessively light areas of the images. This is a great tool that will save you a large amount of re-rendering time. Using the light level sliders manually is typically more effective than the Auto Level button. Note: Select Cancel to reset to the original light levels. If you select Apply, you will permanently alter the image. If you do select Apply, make sure you Save the image using a unique name. Color ButtonColor balance is an indispensable tool when it comes to matching general color of a render image to a background, getting rid of the blue tint of some exterior render, or adding more of a color to the whole image. You may need to click on Cancel if you are making light level modifications to access the Color features. There are three sliders, one for each RGB value. Moving the sliders away from the middle position will intensify the color of the whole image. If your image looks too green for instance, simply move the Green slider to the left until it looks more balanced. Accordingly, if you image looks too blue like many exterior renders, move the blue slider to the left giving the render a more yellow tint.
Brightness and contrastThese slider will help you bring more or less overall light into your rendering easily. Brightness and contrast slider can be easier to use than the level slider, but they offer less control. They apply changes to the entire image and not just to particular tones. Moving the brightness to the right will add more light. The more you add the less contrast the image will have. Move the contrast slider to the right to add more contrast. You will notice that boosting those values will quickly make the image grainy. Blur and sharpenThe blur slider will make the image look softer. It can be used to slightly attenuate noise. But it will make all edges more blurry. On the other hand, the sharpen slider will make all the edges more visible. It will also bring out the grain (noise) in the image. VignettingVignetting will alter the periphery of the image. Negative value will make the perimeter of the image darker and positive value will make it brighter. Hue and saturationHue shifts all the colors of the image and saturation can boost or attenuate them. If you want to make the image black and white, simply move the saturation slider all the way to the left.
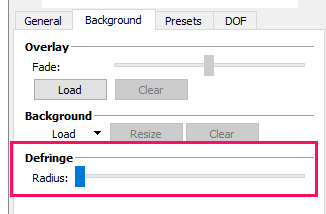
OverlayPrimary function of this filter is to overlay non photo-realistic SketchUp images over or under the Podium rendered image. The effect is to bring out the edge lines from the SketchUp image and blend this with the Podium image. Overlay will blend two images and this is an effective way to blend a SketchUp Exported image with the Podium rendered image. The two overlayed images must be the same resolution for this feature to work. You can try this by exporting a SketchUp model to a 2D image using SketchUp’s Export, 2D Graphic command. Then click on the Load Overlay and select the SketchUp generated image. Move the overlay slider to blend the two images. This way you can blend the obvious SketchUp line edges with Podium's photo-realistic image. This is explained visually in the PIE video tutorial. DefringeThere is now a "Defringe"slider in the Background tab, which is used to clean up the edges of Podium images rendered with a transparent alpha channel.
This is not always necessary, however transparent images (often those containing a lot of vegetation) sometimes end up with a noticeable "fringe" along the edge of the alpha channel. 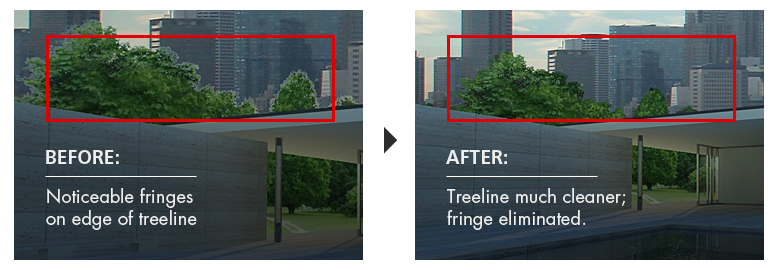
Simply adjust the defringe slider until you see the fringes on your image start to disappear, click apply, and save. Working with .HDR files in Podium Image Editor (read-only)
Podium Image Editor can now load and read .hdr files. This makes two things possible: .HDR in PIE has two limitations:
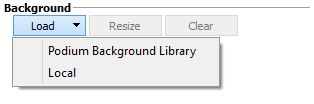
Load Background options
Load Background from your local folder or from a Podium Image Editor Library. You must first render your image with Transparent on before you can add backgrounds. Podium Image Editor Background Library
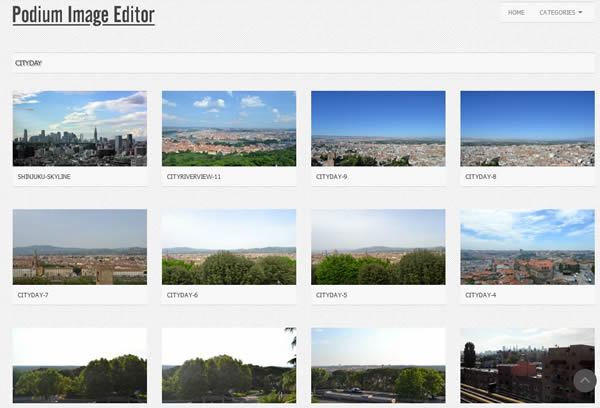
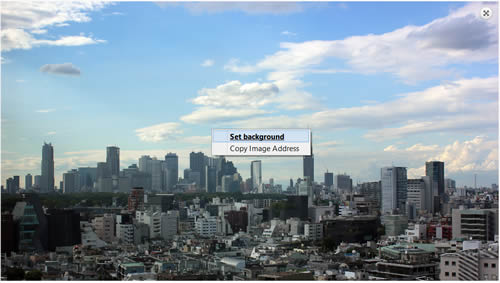
There is a web based Podium Image Editor library that has several hundreds images in various categories that you can use. Cadalog will be adding to this image library periodically. If you use the image library, select the image and use the magnify glass and increase the image size. Then right click on the image. You will see an option to Set background. By selecting this option, the image will be loaded into PIE as the background. Make sure that you have an alpha transparent image loaded in PIE before adding background images.
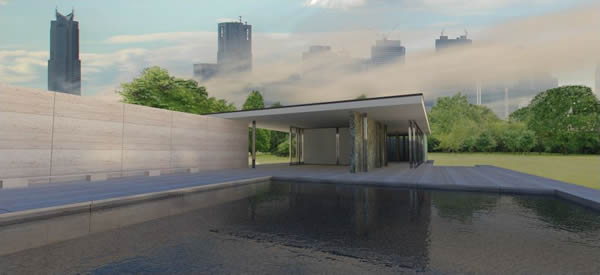
Example background added to PIE and Podium rendered image. Move background images Moving background images is now much easier than in previous PIE versions. Just select Move backgrounds from the Tools menu and grab the background image. Resize background images
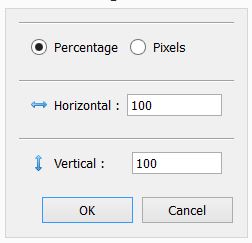
You can now resize background images easily. Local BackgroundFor this option to work, you will need to render your model using the transparent PGN option in Podium's Option menu. Once you have rendered, open the rendering with PIE from OOPR. Then load a background image. You may need to use the Arrow buttons to move the background image around to a position that is effectively gives you a new background. Background is a very effective tool to load your own 2D backgrounds "behind" a transparent Podium image. This feature eliminates the need to use Photoshop or other post processing software to achieve great results.
History The history drop-down maintains a change-log and allows you undo changes to a precise point in the editing process. However once the “Apply” button is clicked, history is cleared and you will no longer be able to reverse changes using the “History” or “Cancel” buttons. In this case, you would need to close the file and reload an older version from the OOPR or manually from the file menu of the Podium Image Editor. The History log does not work with Preset filters. Crop Image (Pull Down menu)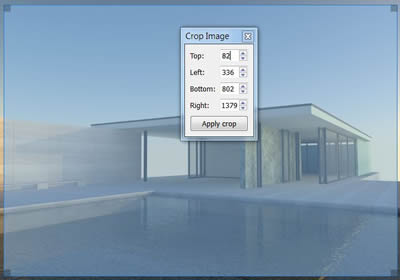
Cropping allows you to crop your image to a new resolution size. Once you apply the crop, you can not undo it. Find Crop Image in the upper Tools pull down menu. You can zoom in areas, move the corners or input actual resolution size. When ready, click on Apply Crop. You will be ask “are you sure?”. When you are, the crop will be applied to the image.
Preset filters
Presets are predefined filter sets that will apply a specific look to your render very quickly. Select a preset to preview it in PIE, and click the apply button when you are happy with the outcome.
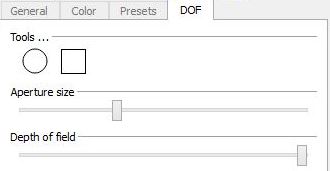
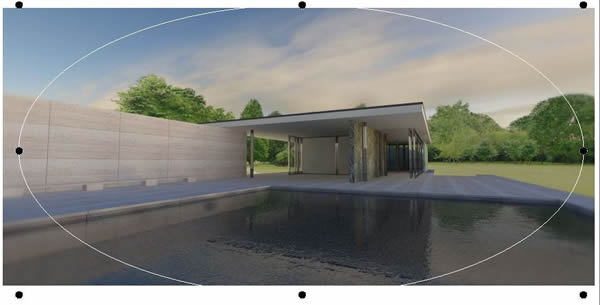
DOF or Depth of Field Although named DOF, this effect is similar to a Tilt-Shift function. This is where you can choose the sharp region of an image in PIE with either a ellipse or rectangle shaped aperture and the amount of blur for the "non-sharp" regions. The blur is controlled by the size and intensity of the aperture as well as the Depth of Field slider.
Lower Slider
Apply
Save
Panorama
Panorama Convert (Pano to Cubic)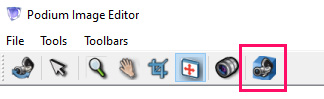
New in v2.5.5 - PIE now includes a utility to convert an equirectangular panoramic image into a six square "cubic" images. This can facilitate editing the cube image and then reassembling them back to an equirectangular image. You can also turn your SU Podium created panoramic scene into six cubes to load into Podium Walker for spherical backgrounds in Podium Walker. Read more about this function here. |


© 2026 Cadalog, Inc. All Rights Reserved.
