- SUPlugins Home Page
- Help Video Tutorial
- Forums
- FAQ and trouble shooting
- Operating SU Podium
- 1. Intro and Download
- 2. Install, Troubleshoot, Uninstall
- 3. Activate License
- 4. Render process and getting started
- 5. Download and samples to test
- 6. Where to get Support
- 7. What version do I have?
- 8. Check List to help Support.
- Options Menu
- Apply Material Properties
- Lights
- Render, OOPR, Preview
- Other items in the pull down menu
- Other Features and plugins
- 1. Podium Browser
- 2. Preset Editor
- 3. Omni Grid V2
- 4. Podium::Render script
- 5. RenderAll scenes
- 6. Podium Styles
- 7. Section_Tool
- 8. EditInPlace
- 9. PanoramaVR
- A summary of Tutorials
- SU Podium Books
- Software End User License Agreement
SU Podium V2.x Plus Tutorial - How to use Presets
One of the most important items to be aware of when using SU Podium V2.x is the preset you choose to apply. Read this section from the SU Podium V2 help pages if you are not familiar with presets.
Render presets remove the complexity from configuring the various parameters of the Kray render engine. At its simplest, all you need to do is choose your preset and click 'Render'
In practice however, sometimes the preset you choose, can produce unexpected results. Often there is a simple solution to the unexpected results problem.
This tutorial will explain a little more about presets, which ones to choose, and will show the differences between them. We are going to concentrate on interior scenes, because the preset choice is much more important for interiors than exteriors. That is because the subtle global illumination effects produced by the higher quality presets are not as obvious on exterior renders. Furthermore exterior scenes tend to have much more geometry such as 3D trees, cars, etc therefore higher quality presets can take a significant amount of time to render.
Standard vs QMC, Biased vs unbiased
There are several names of presets for interior and exterior: 1.0.5_preview, 1.0.5_default, 1.0.5_high, 1.0.5_AA_fine (V2Plus), 1.0.8_high (V2Plus). And then there is 1.0.3_QMC. We will refer to the standard presets for the preview, default, high and fine presets because these are based on a biased rendering method. QMC is different.
The difference between the standard and QMC presets is a little technical. The standard presets (preview, default, high, fine) use a 'biased" render algorithm called Photon mapping with irradiance caching. The way this works is that a set number of photons are fired in a more or less random pattern from the light sources into the scene and traced back to the camera (your view). This creates an 'irradiance map' where the scene is divided up into a series of small regions or cells of equal illuminance, or light distribution. This is the stage you see during SU Podium's pre-rendering and is illustrated below in Figure 1.
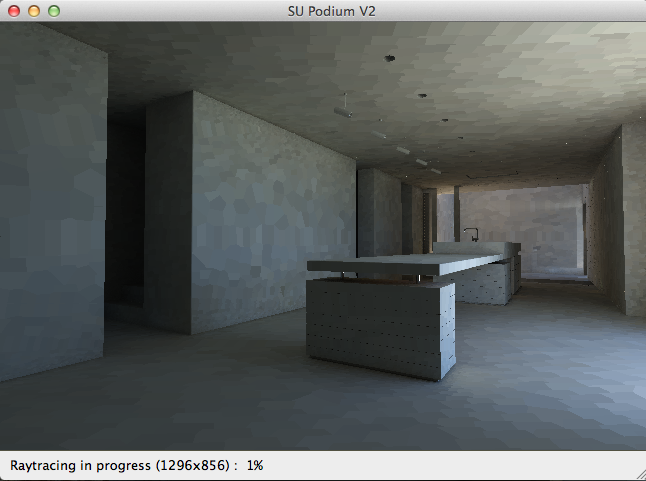
Figure 1. Prerender stage showing cells for illuminance calculation. Click on the above image to see a higher resolution.
You can see each cell clearly in the image above. There are more cells in the corners where there is more contrast. Notice that this means that Podium is not firing one photon for every pixel in the scene. The next stages in the render refine this solution and blend the light between each cell to produce a smooth graduation of light. Because this solution is based on an interpolation between sampling points, this is called a 'biased' render.
Configured properly, this approach can be accurate and very fast. The difficulty is to optimize the number of photons fired to get the best result in the shortest time. If you look at this stage in OOPR during rendering, and create a screen capture, it is interesting to compare the images between presets. You can clearly see the number of cells that the render engine uses to create the illuminance calculation.
The QMC presets are unbiased and fire photons uniformly into the scene. There is no dividing into cells and optimizing. This is a 'brute force' solution which relies on firing more photons. It's more accurate, and far less prone to blotches but it's a lot slower. QMC presets are also 'grainy'. QMC presets are configured this way to keep the render time manageable, but to eliminate graininess you have to render at a higher resolution size and reduce the size in post-processing. It's time-consuming, but an easy solution that should work for all scenes.
Of the standard (non QMC) presets, each has slightly different values for the render parameters to achieve slightly different results. The biggest difference is in overall brightness. Interior presets have their brightness levels boosted, so choosing the correct preset is very important.
All presets have release numbers. As they are updated to improve performance or take advantage of new features, the release number increases such as 1.0.5 to 1.0.8. If you render scenes with a particular preset and leave the render info bar on, the info bar will give you information about what particular preset you used for the scene. That helps you remember and obtain the same results with the same preset.
The 1.0.5 series presets are the principal ones that have been installed with the last few SU Podium V2 builds. For exteriors, the 1.0.5 exterior default is usually perfect, and is an excellent balance between speed and quality.
Figure 2 below shows how this renders exteriors.
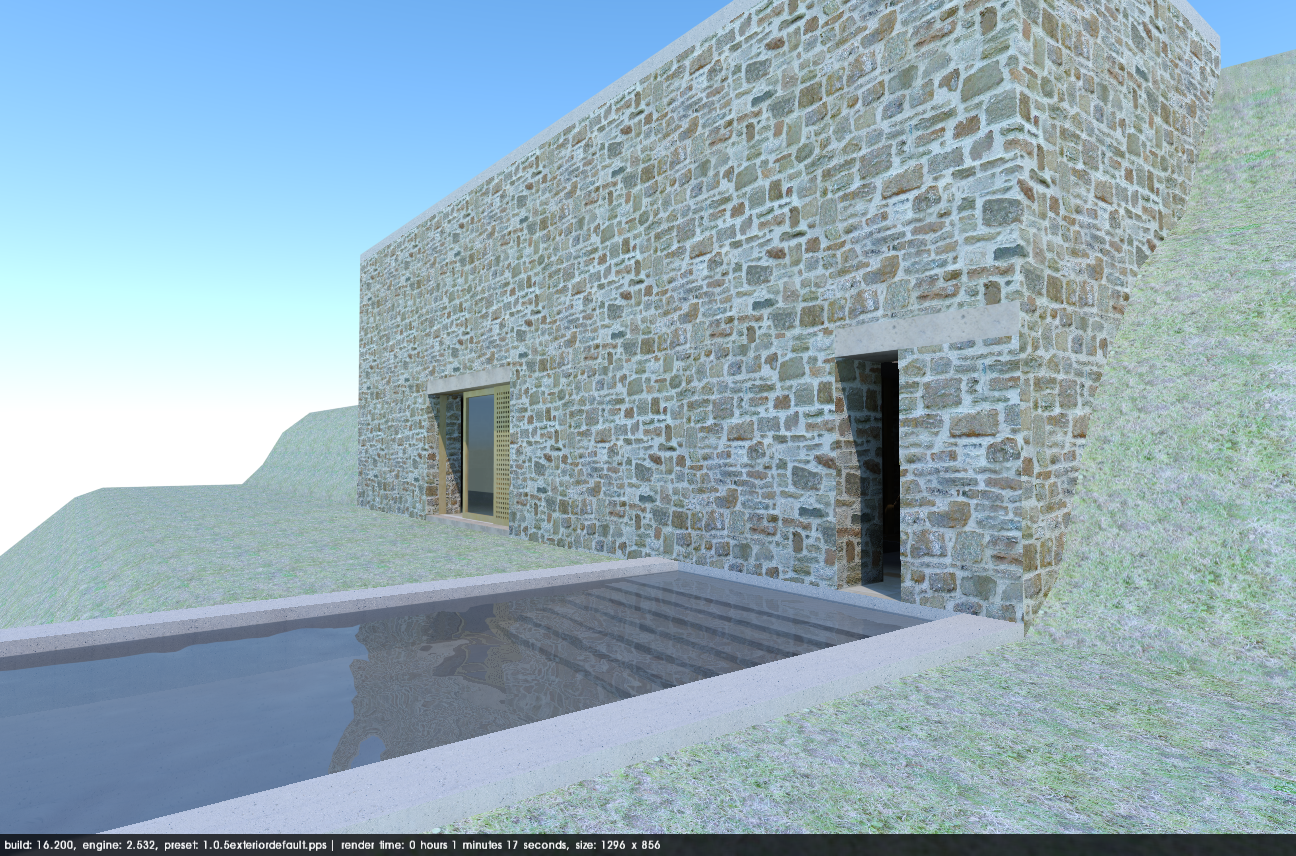
Figure 2. Exterior render with 1.0.5 exterior preset - render time 1 minute 17 seconds. Click on the above image to see a higher resolution.
General quality is good. We could improve this image with some post-processing to balance the lighting, but as you can see, there are not many areas where improved global illumination would make a big difference.
If we move to the interior of the model and try to render an interior, it appears very dark, as shown in Figure 3 below. Although it's fast at 1 minute 45 seconds, it's rather dark.
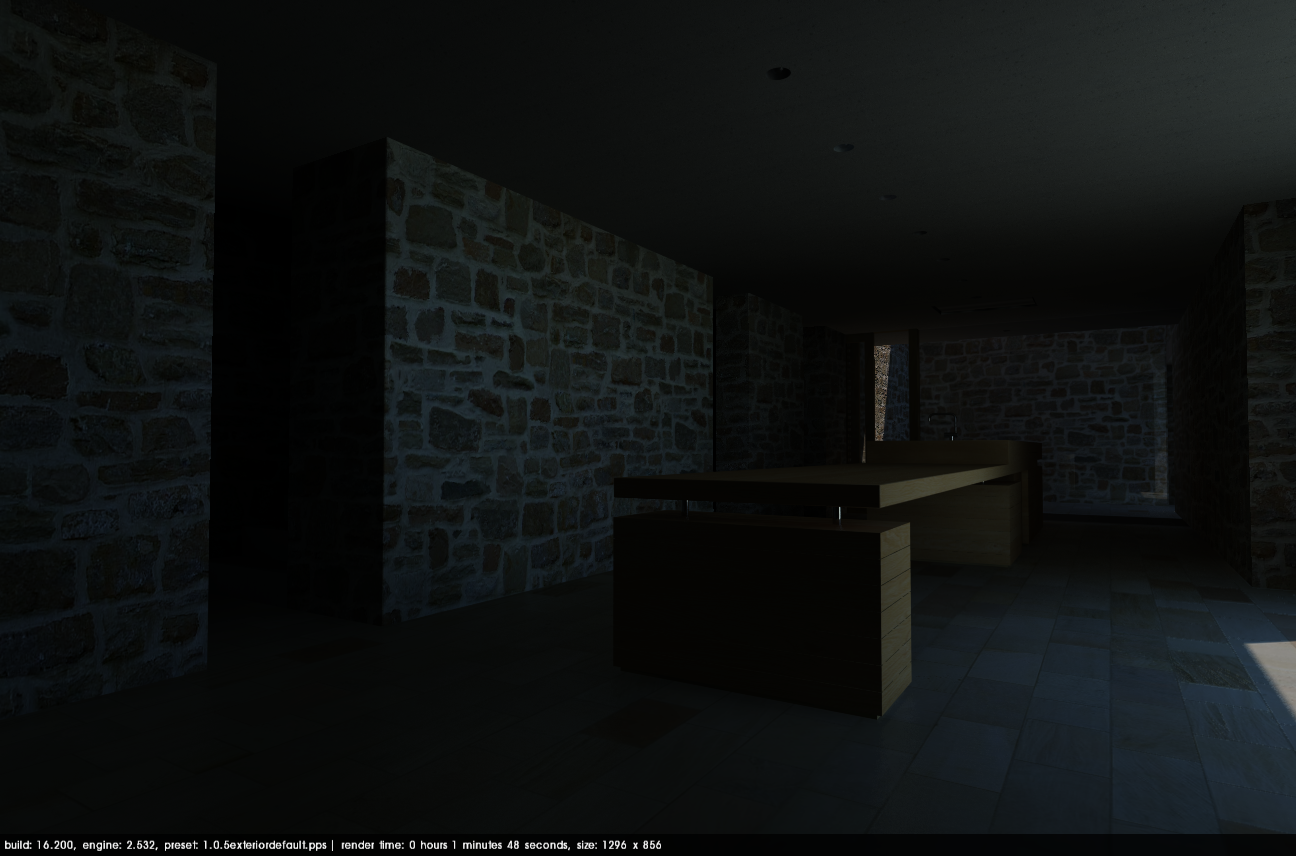
Figure 3. Interior render with 1.0.5 exterior preset - render time 1 minute 48 seconds. Click on the above image to see a higher resolution.
If we increase the intensity and exposure sliders to their maximum, we end up with a slightly brighter image as shown in Figure 4 below.
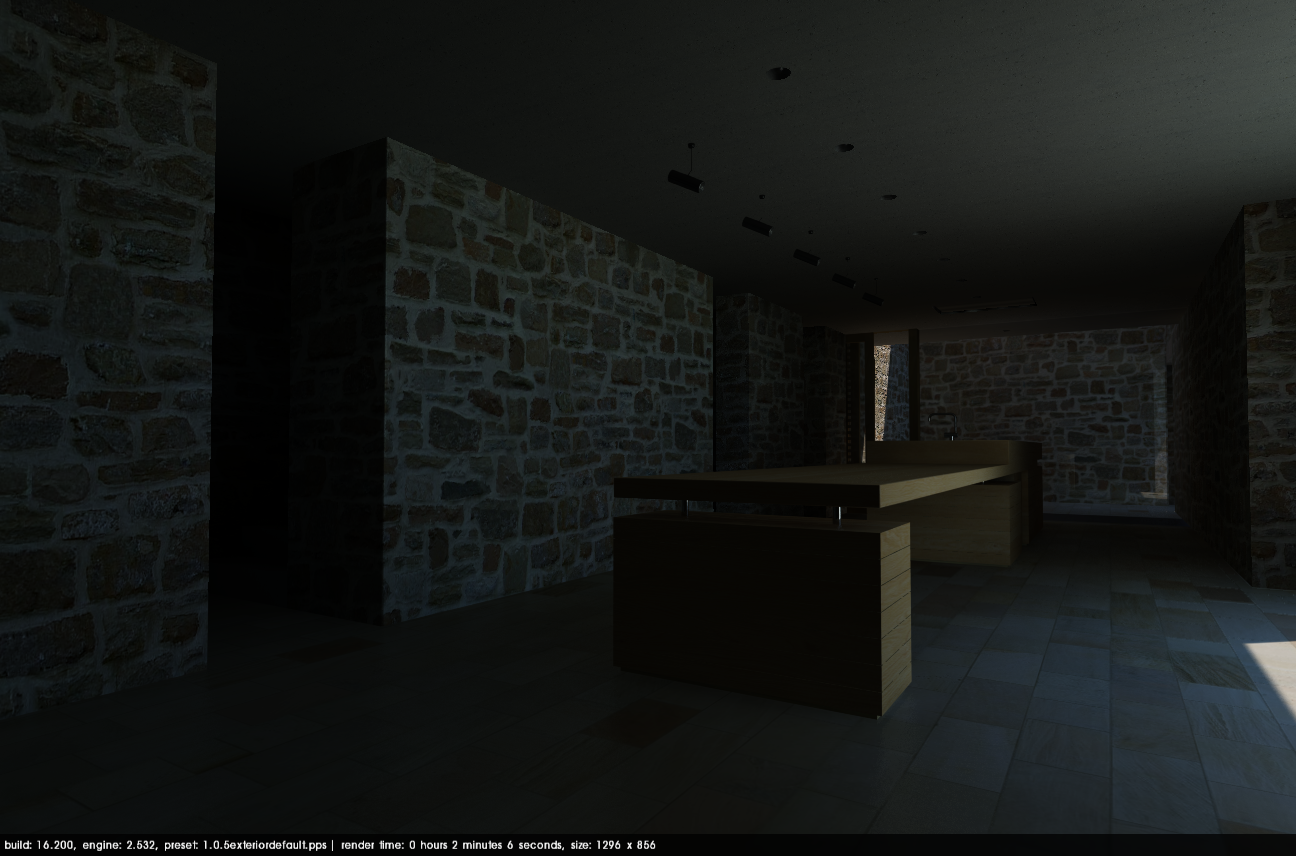
Figure 4. Interior render with 1.0.5 exterior preset, exposure & brightness sliders set to maximum - render time 2 minutes 6 seconds. Click on the above image to see a higher resolution.
Using the new Podium Image Editor in Podium V2.x and changing the light sliders, we can obtain a pretty decent interior image from an Exterior preset as you can see from Figure 5 below.
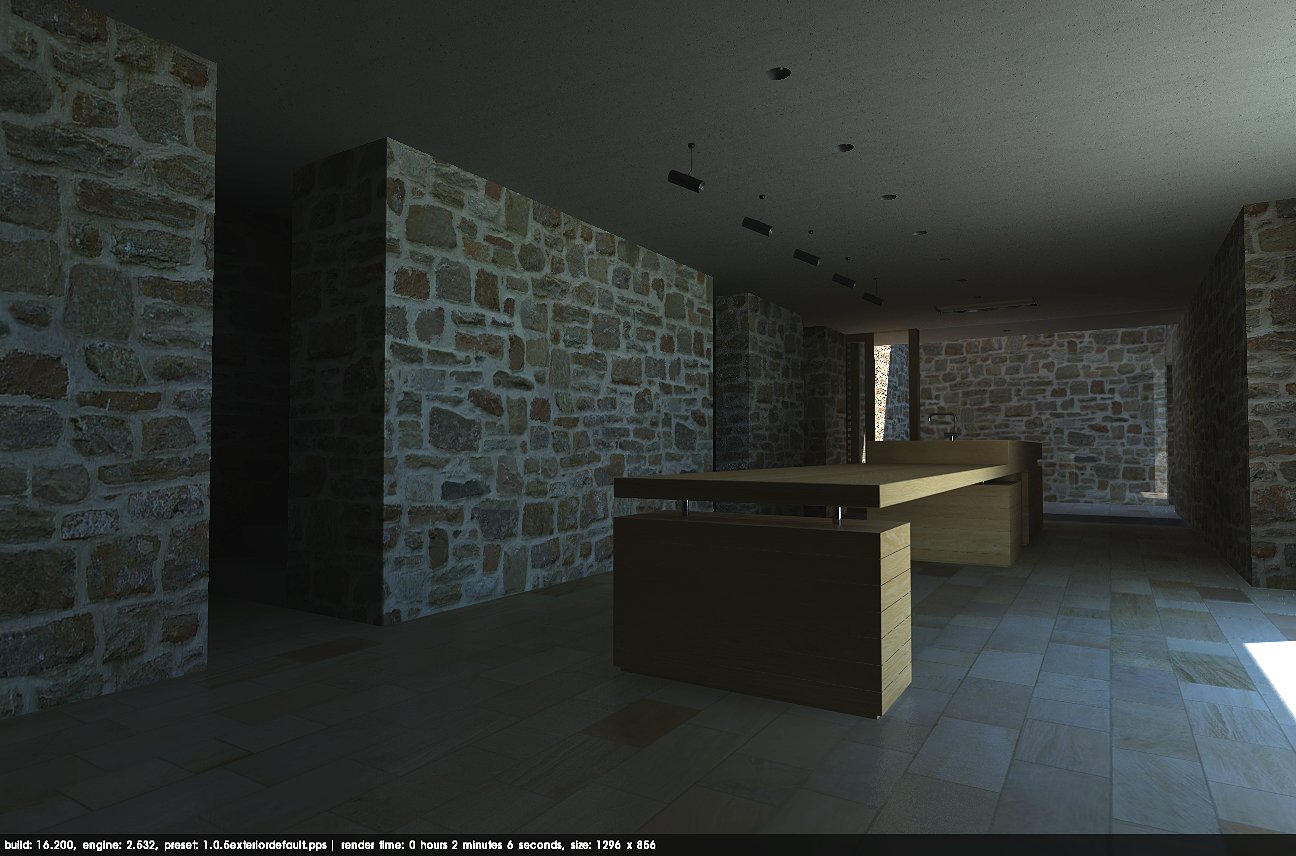
Figure 5. Same render after post-processing with Podium 2 Plus's Podium Image Editor - render time 2 minutes, 6 seconds. Click on the above image to see a higher resolution.
For a simple scene, using Exterior preset may be all that is needed. It's a fast two minute render time! But that quality settings with the exterior presets are lower than for interiors. For simple scenes this may not make any difference at all, but considering how fast the exterior presets are, it's worth trying them especially with exposure to sunlight with larger windows. However as you can see the image is still rather dark, so let's see what the other presets do.
Next, in terms of brightness is the default preset. It is brighter than the exterior presets, but darker than the interior ones. You can use it for interiors with large windows where the interior presets produce a very overexposed image.
Figure 6 below shows how the default preset renders with this scene.
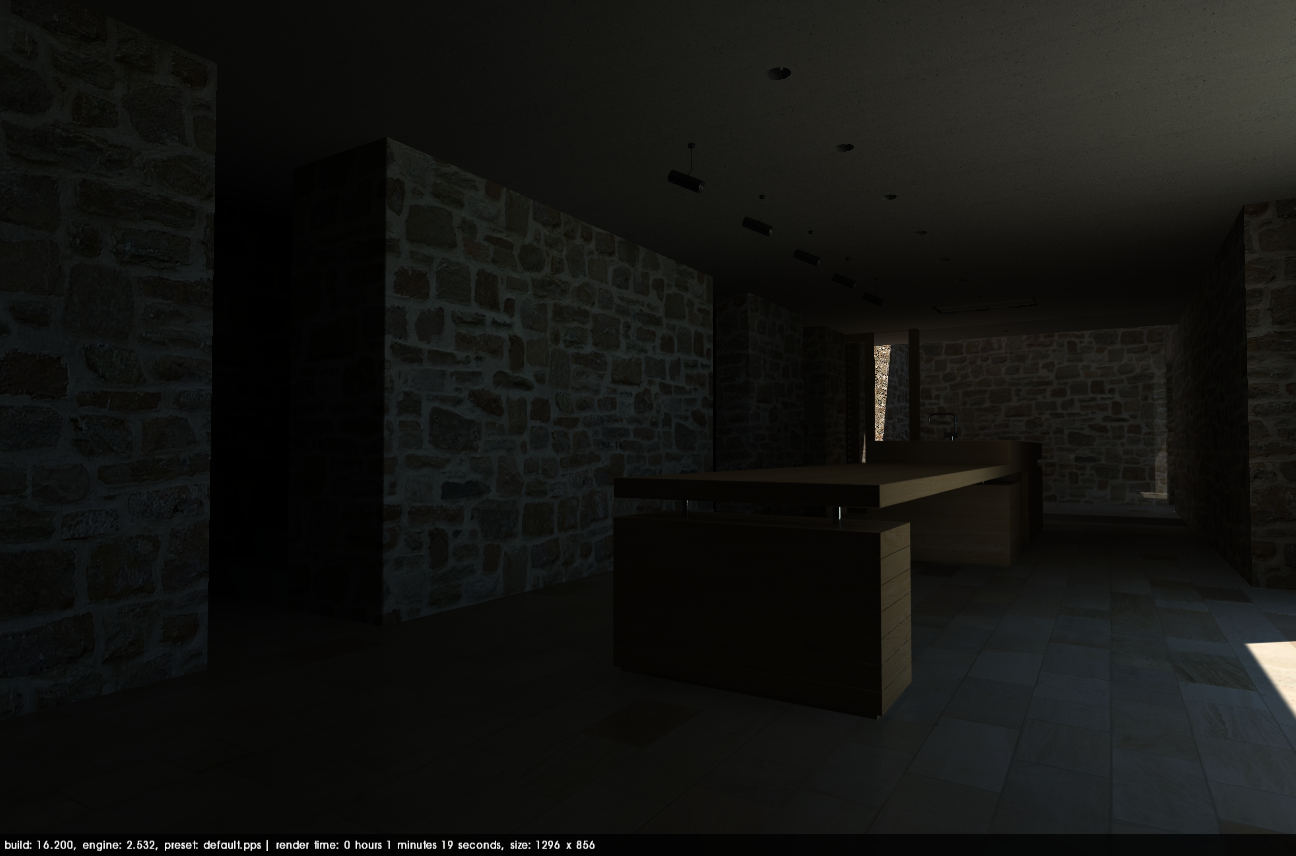
Figure 6. Scene rendered with default preset - render time 1 minute 19 seconds. Click on the above image to see a higher resolution.
As you can see, the default preset is more or less the same as the exterior_default preset with the brightness and exposure turned up to the maximum. Let's turn brightness and exposure sliders up to the maximum for the default preset and see what this looks like. Figure 7 below shows the resulting render. For a rendering time of slightly more than two minutes, this image is pretty good.
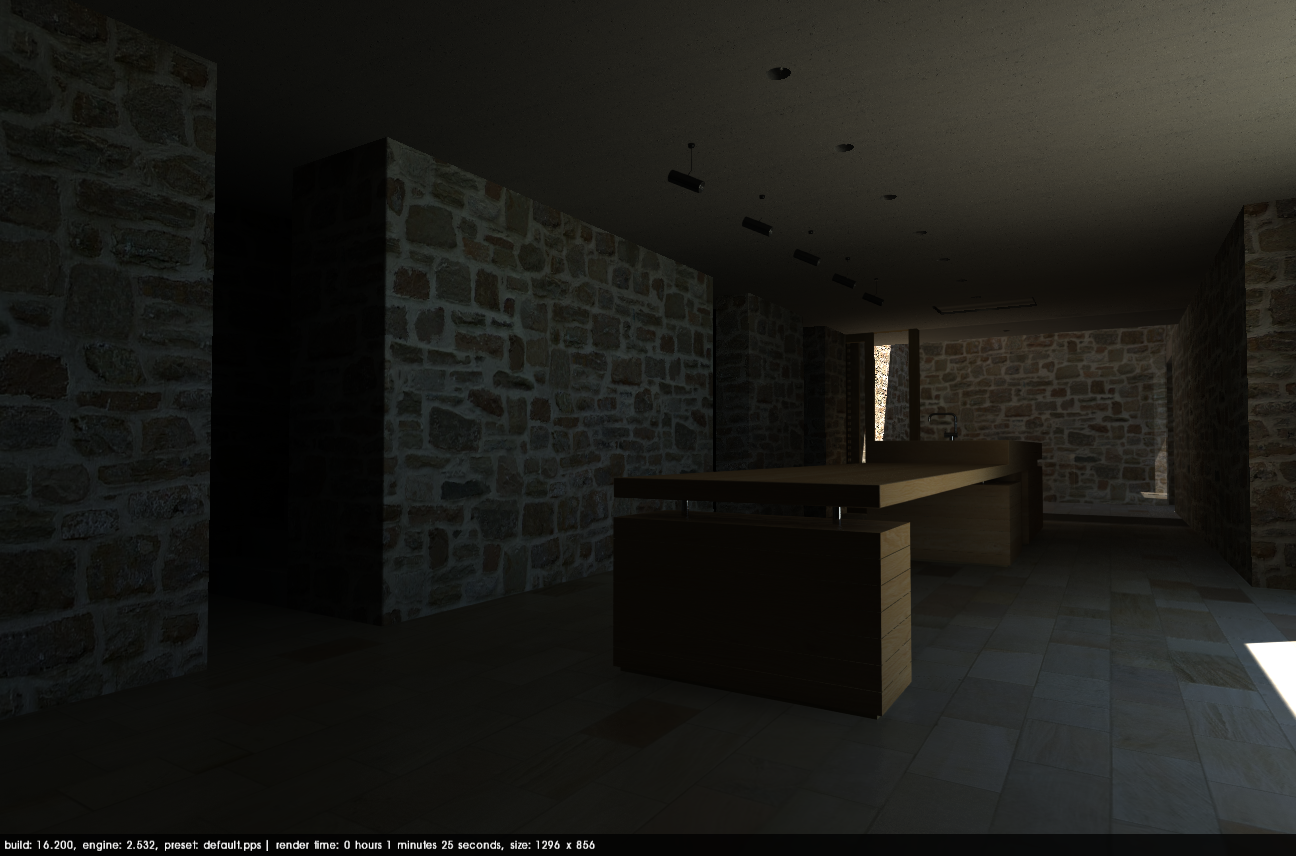
Figure 7. Scene rendered with default preset, brightness and exposure sliders set to maximum. Click on the above image to see a higher resolution.
When we adjust lighting in PIE, we get an even better image shown in Figure 8 below.
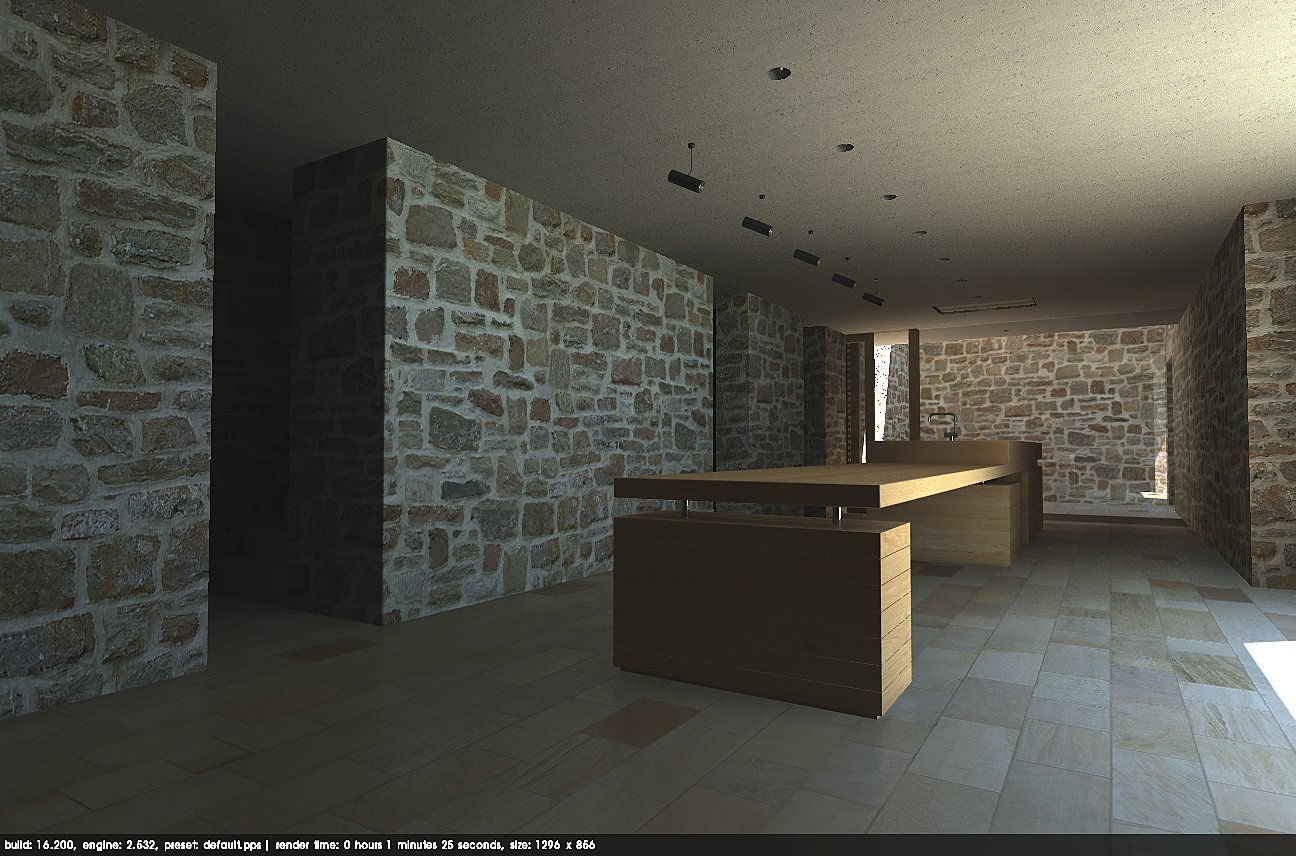
Figure 8. Same render after post-processing with Podium Image Editor. Click on the above image to see a higher resolution.
We are getting closer and closer to realistic lighting levels.
It should be remembered that the quality of the global illumination and materials is still fairly low. You can see this by looking at the edge of the counter where it meets the floor. There is very little global illumination there and graduation of soft shadows compared with the higher quality presets.
Let's try with a dedicated interior preset, the 1.0.5 interior_default, shown in Figure 9 below.
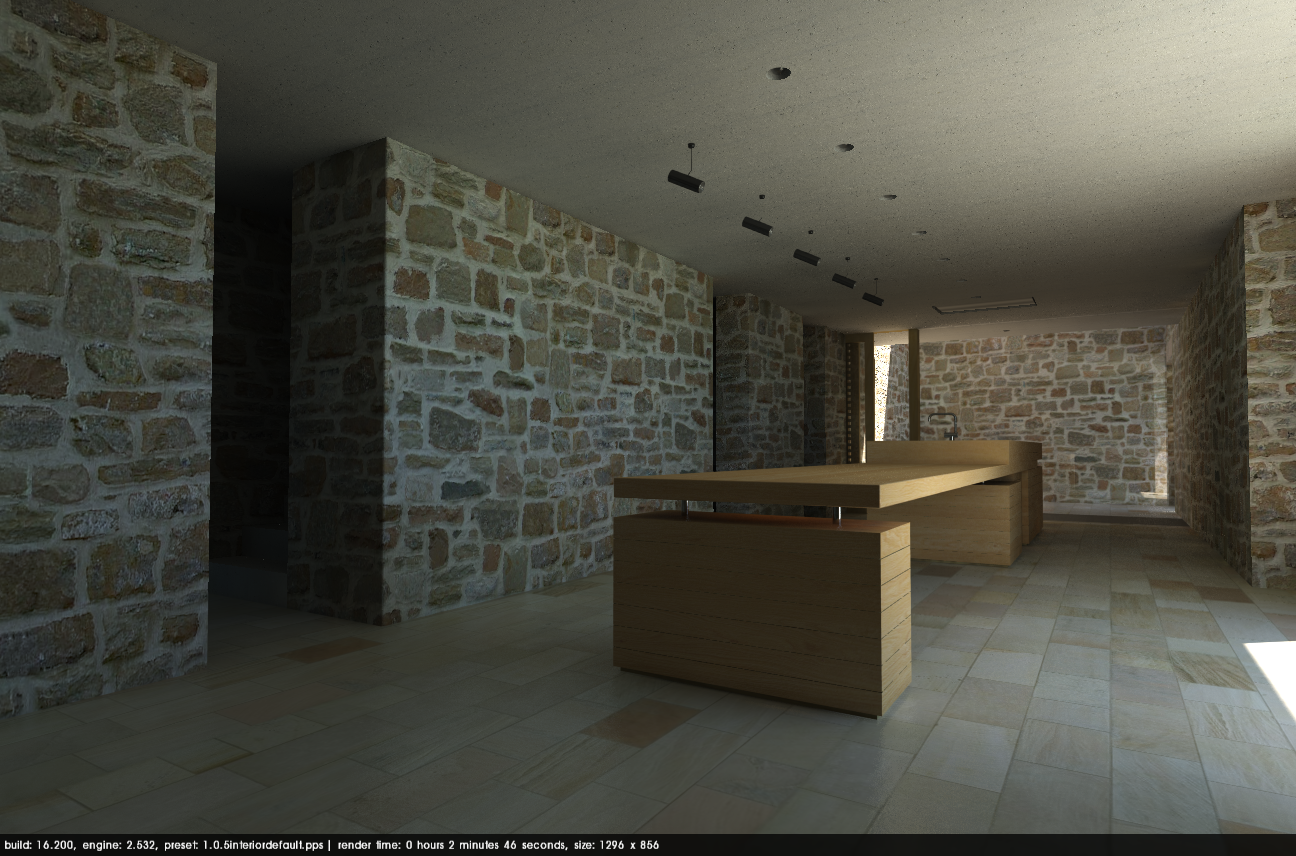
Figure 9. Scene rendered with 1.0.5 interior default preset. Click on the above image to see a higher resolution.
Now we are getting closer to what we would intuitively expect to see in a room of this type. We can see that the reflections on the floor and global illumination shadows are much more subtle. That's because several parameters in the preset have been adjusted to increase image quality. If you look at the image very carefully, you can see that the small shadow gaps in the kitchen unit are broken and not very clear. This is where the 1.0.5 interior_high preset is useful. Figure 10 below shows what this does.
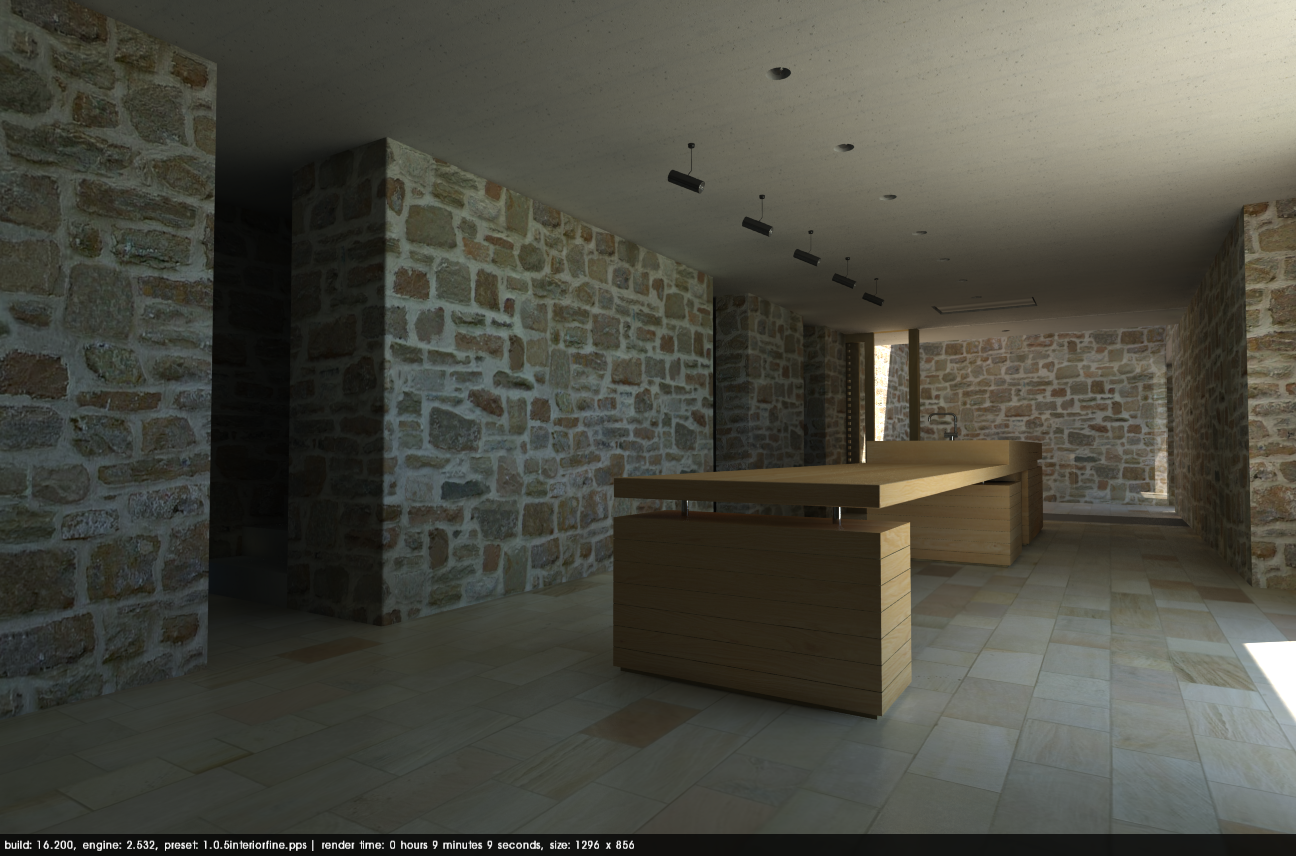
Figure 10. Scene rendered with 1.0.5 interior high preset. Click on the above image to see a higher resolution.
The overall image quality is the same, but the algorithms relating to edge sharpness have been adjusted to increase definition. If you look at the ceiling, you can see that this texture has also been smoothed. However - look at the render time. It has increased from 2minutes 46 seconds to a little over 9 minutes. The image is nicer, but render time takes a big hit! This preset is badly named as many people will use it thinking that it will produce the best image. It can produce better images, but with a big speed penalty, and you will only see the benefit if you have very fine details like cables or shadow gaps in your image. This preset will be renamed to make it easier to understand what it should be used for.
Let's try the QMC preset. Figure 11 shows how this renders.

Figure 11. Scene rendered with 1.0.3 interior QMC preset. Click on the above image to see a higher resolution.
The quality is better as you can see from the subtle shadows on the ceiling cast by the sunlight through the window bouncing off the floor to the ceiling. The light fittings are casting very faint shadows on the ceiling. You can see that the whole scene has a slightly grainy quality to it, and the fine shadow gaps are broken again. Most notably, render time has increased to almost 1 hour 10 minutes!
Let's try the new 1.0.8 interior_high preset. This render is shown in figure 12 below.
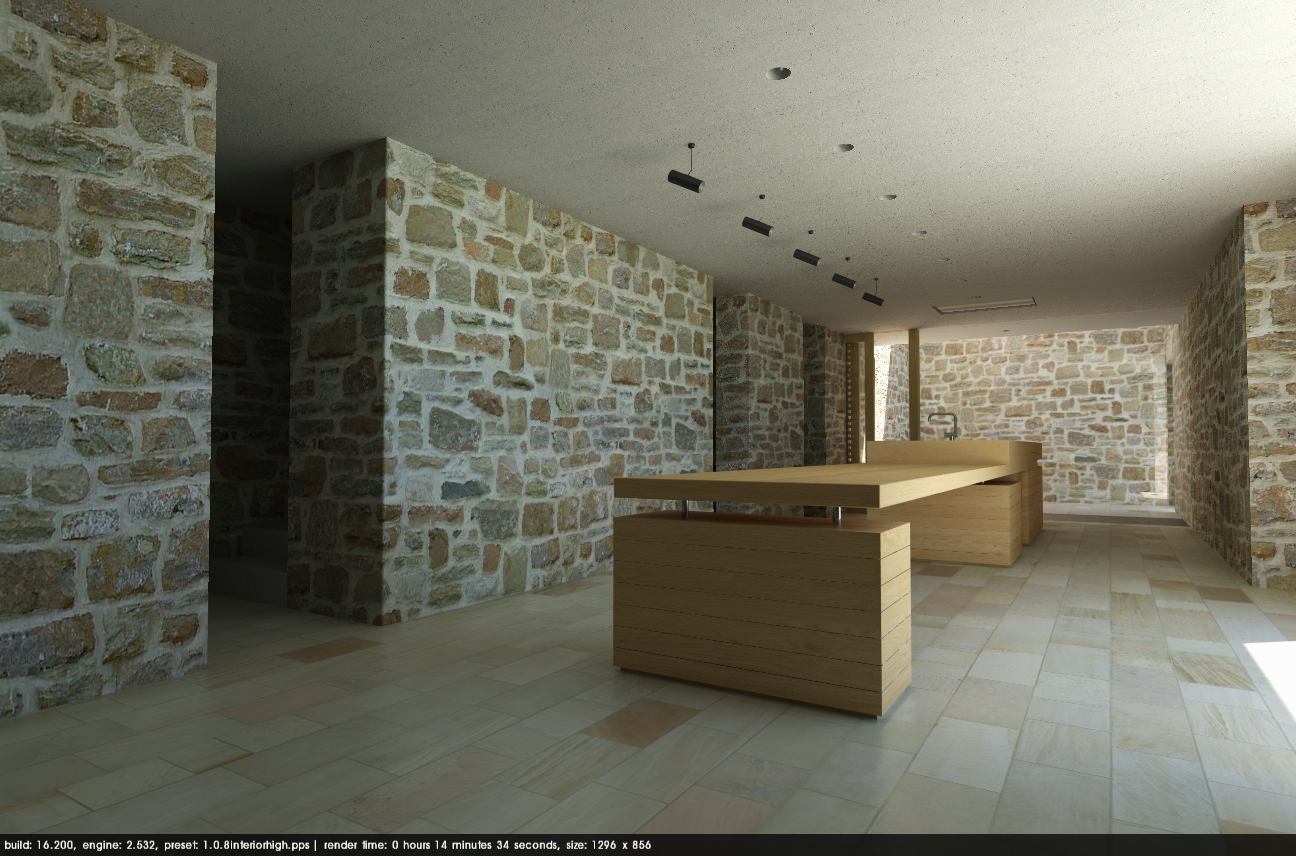
Figure 12. Scene rendered with 1.0.8 interior high preset. Click on the above image to see a higher resolution.
You can see that quality is slightly better than the QMC preset. The color balance is warmer. The shadows from the lights on the ceiling are more distinct. And brightness is even better. Render time has increased to over 14 minutes, but anti-aliasing (edge smoothing) on the fine gaps between the planks is not as high as the 1.0.5 interior high preset. For high quality interiors, this should be the best preset for most scenes. In a different tutorial I will cover modifying presets to increase anti aliasing quality.
Another issue that affects preset choice is blotches. Some scenes, particularly those with additional light sources can end up with strange artifacts.
Figure 13 below shows an example of this.
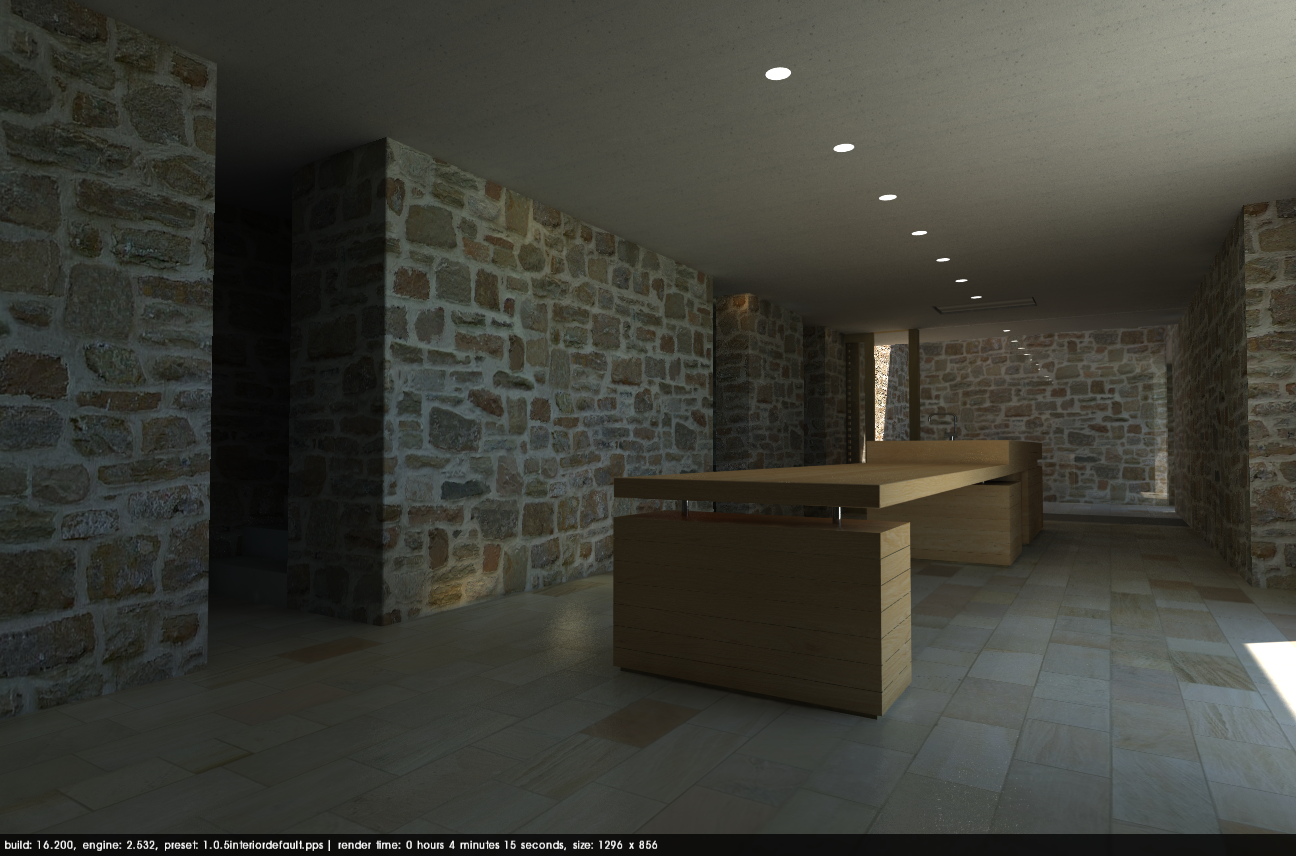
Figure 13. Scene rendered with 1.0.5 interior default preset, showing blotches from lights.Click on the above image to see a higher resolution.
As you can see, there are strange light patches on the stone wall that don't appear to be associated with specific lights. These image artifacts tend to be more common when using artificial lights, and can take the form of either light or dark splotches. It is caused by the sampling parameters in the preset not being well suited to the model. They tend also to be more common when there are fewer objects in the model.
Switching to a different preset will usually fix the problem. Figure 14 below shows the same scene rendered with the default preset.
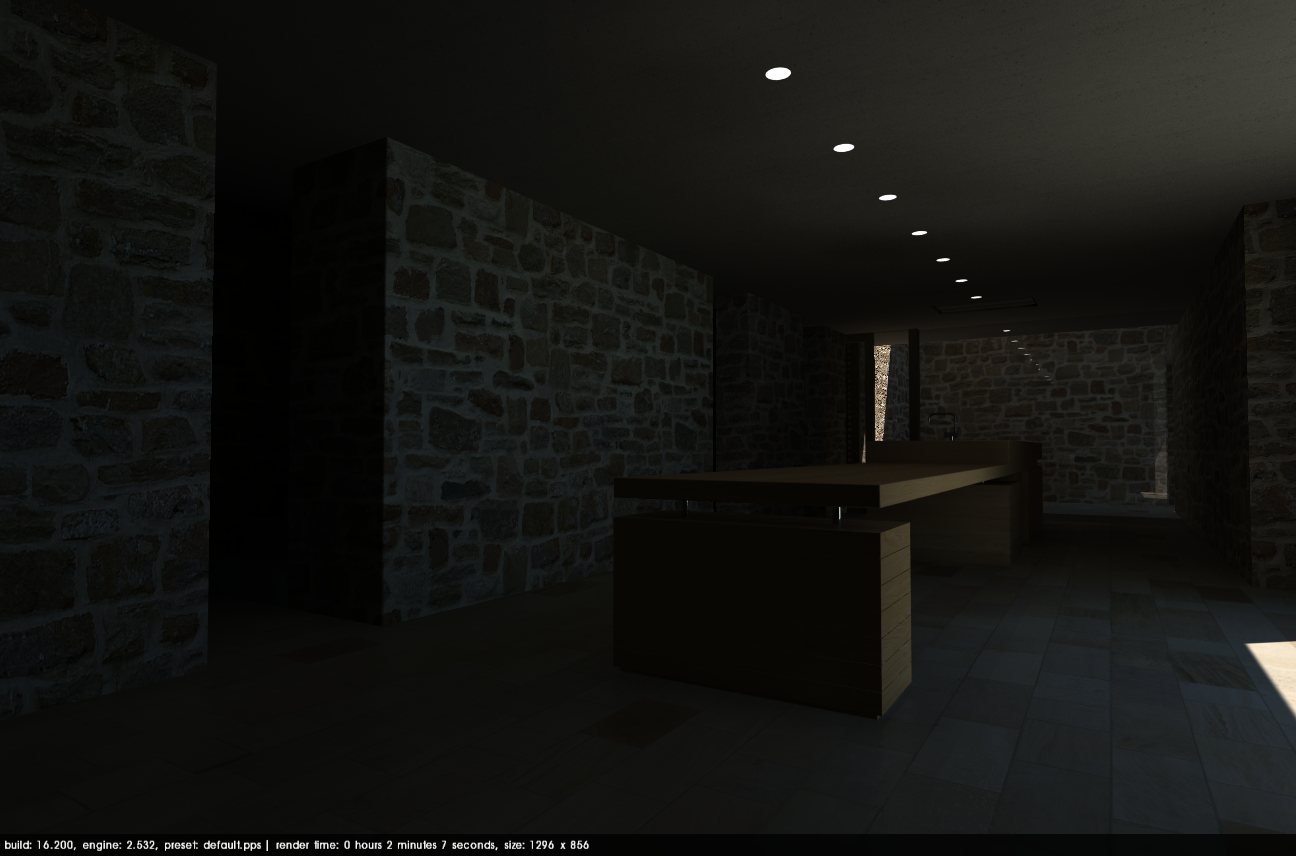
Figure 14. Scene rendered with default preset, showing no blotches from lights.Click on the above image to see a higher resolution.
There are no blotches, but quality is not as high and lighting is too dark.
Figure 15 below shows the same scene rendered with the new 1.0.8 interior_high preset
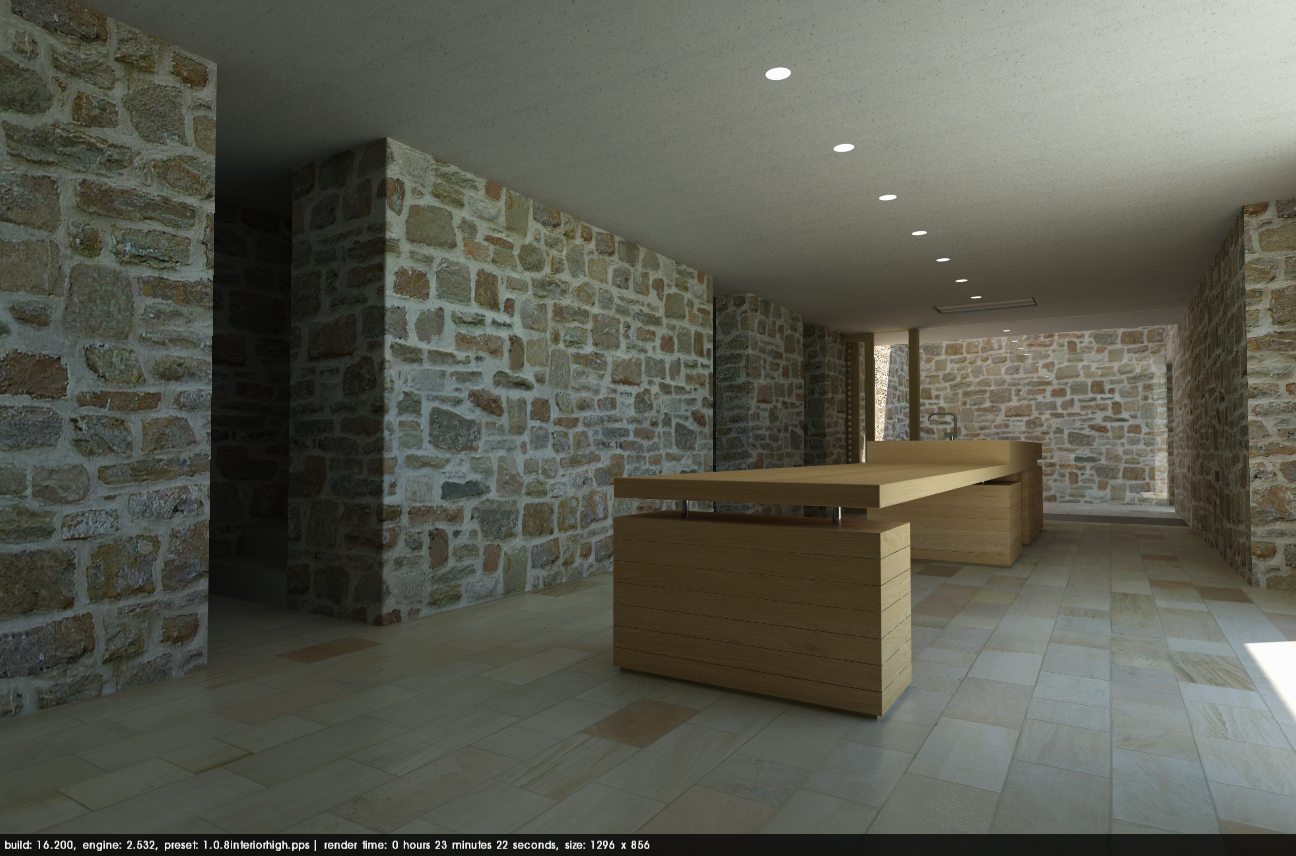
Figure 15. Scene rendered with 1.0.8 interior high preset, without blotches. Click on the above image to see a higher resolution.
You can see that with higher quality presets which undertake more calculations with less interpolation, the results are slower, but more accurate. This is the general rule in terms of rendering.
Figure 16 below shows the same scene rendered with the QMC preset.
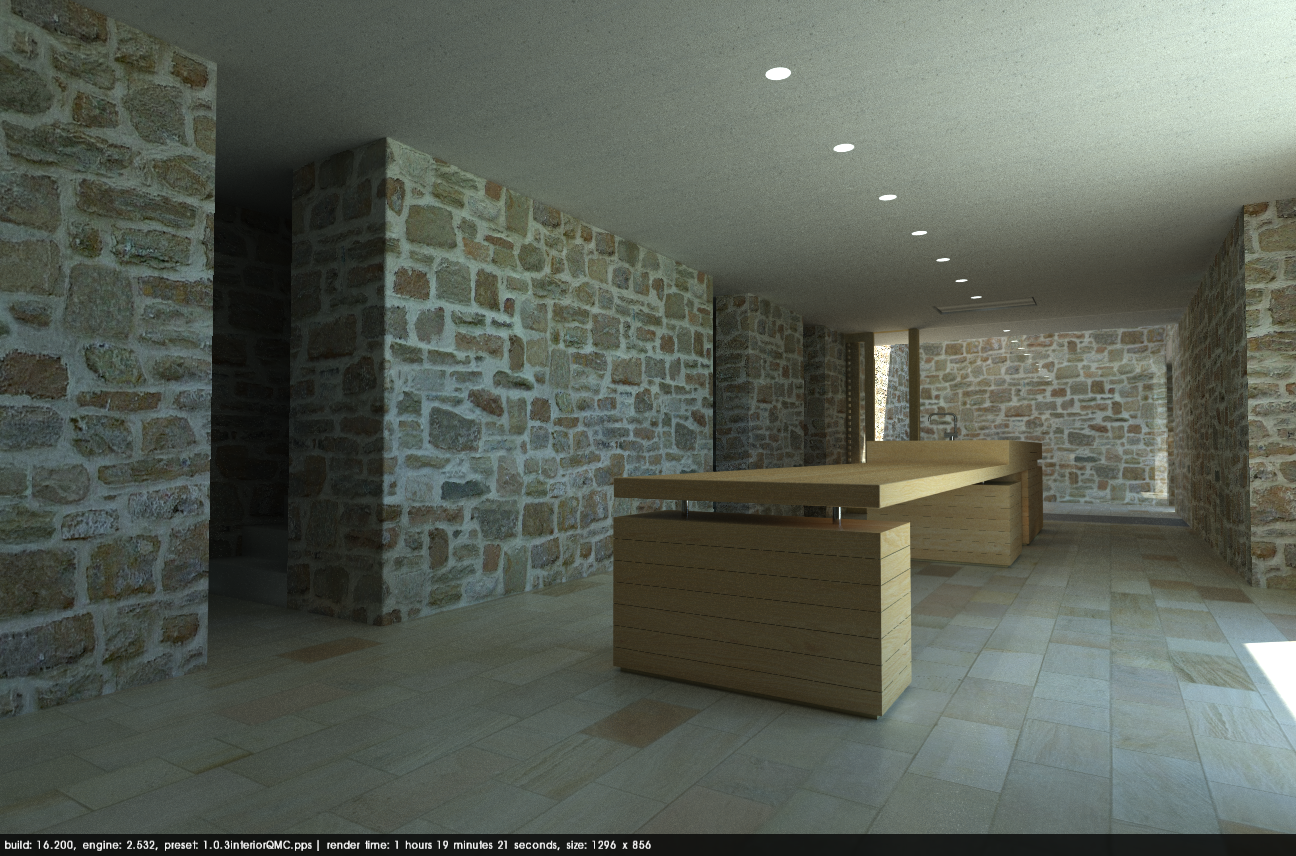
Figure 16. Scene rendered with 1.0.3 interior QMC preset. Click on the above image to see a higher resolution.
You can see that the image with the biased preset is actually a nicer image than that created with the QMC unbiased preset. This is entirely due to how we have configured the QMC preset. Generally, unbiased presets should always create higher quality images, but render time is significantly longer. When set up to produce results in an acceptable time, the resulting image is grainy because not enough points in the image have been sampled. Given more samples to eliminate the grain, and a lot more time, this image would be perfect quality - if you could afford to wait for it!
What effect render time other than your choice of presets
One thing that is also evident in this example is that adding lights increases render time. Adding just 7 omni lights has increased render time noticeably with every different preset. This needs to be remembered when adding lights to any model. If you add hundreds of light points, your render time will plummet, and because of the increased memory requirements to store the large data structures, if you don't have enough RAM, your scene may not render at all.
Render time (apart from preset choice) is dependent on many things - hardware specification, scene size and material complexity. It's not just a function of SktechUp file size. If you imagine a SketchUp model of a classical Greek temple with detailed columns. You could reduce the file size by possibly 80% if you made each column a component but doing this would not affect render time because the detail of each column has a large number of faces.
Similarly if you have a simple SketchUp file but with some large, high resolution textures. This will create a large file size for a fairly simple model. Lots of transparent and/or curved reflective surfaces also increase render time because of the complexity of the calculations involved.
The main things to remember are to keep the polygon count as low as possible to create the required quality level. Delete objects from scenes that are not visible, because the render engine calculates everything, including those things which are out of the camera view. It takes the same amount of time to render a fisheye lens view of an entire room, as a view of just a single wall!
Minimise your light sources. Most buildings do not have all the lights on in the day when the sunlight is strong. Rendering is in part an attempt to recreate our perception of what we see. By this I mean that the brain interprets the information received by the eye, enhancing and balancing and assembling different parts of an image. All this happens seamlessly in the background and we think we see a coherent image. What we actually see is a merged post-processed collage of image fragments. The brain pieces together different fragments of what the eye sees. The brain focuses the images and adjusts the brightness and color balance. A render engine can simulate reality in terms of parts of what the eye can see, but how we perceive images is not at all the same. This is why we need tricks with a render engine.
For Podium, we have tried very hard to configure the render engine and presets to make sensible choices that produce great quality images, really fast, with the least amount of configuration. The presets are the basis of this approach, so choosing the most appropriate one is obviously important!
As you can see, the principles are quite straightforward, and the Podium Image Editor means that images that previously might have been thought to have been a waste of time are now potentially usable. PIE cannot replace complex photo editors such as Photoshop, but for quick adjustments you can tweak your image in less time than it would take to open a high end image editor!
That concludes this tutorial. If you have any questions, please post them on the forum.
Happy rendering!
© 2026 Cadalog, Inc. All Rights Reserved.
